TNS Config and licensing
Configuration and Licensing
To begin configuration, click on Create/Destroy option on the
side-menu (or the shortcut on the panel shown when first logging in).
The Cluster Create page scans for clusterable nodes (those running
RSF-1 that are not yet part of a cluster)
and presents them for selection:
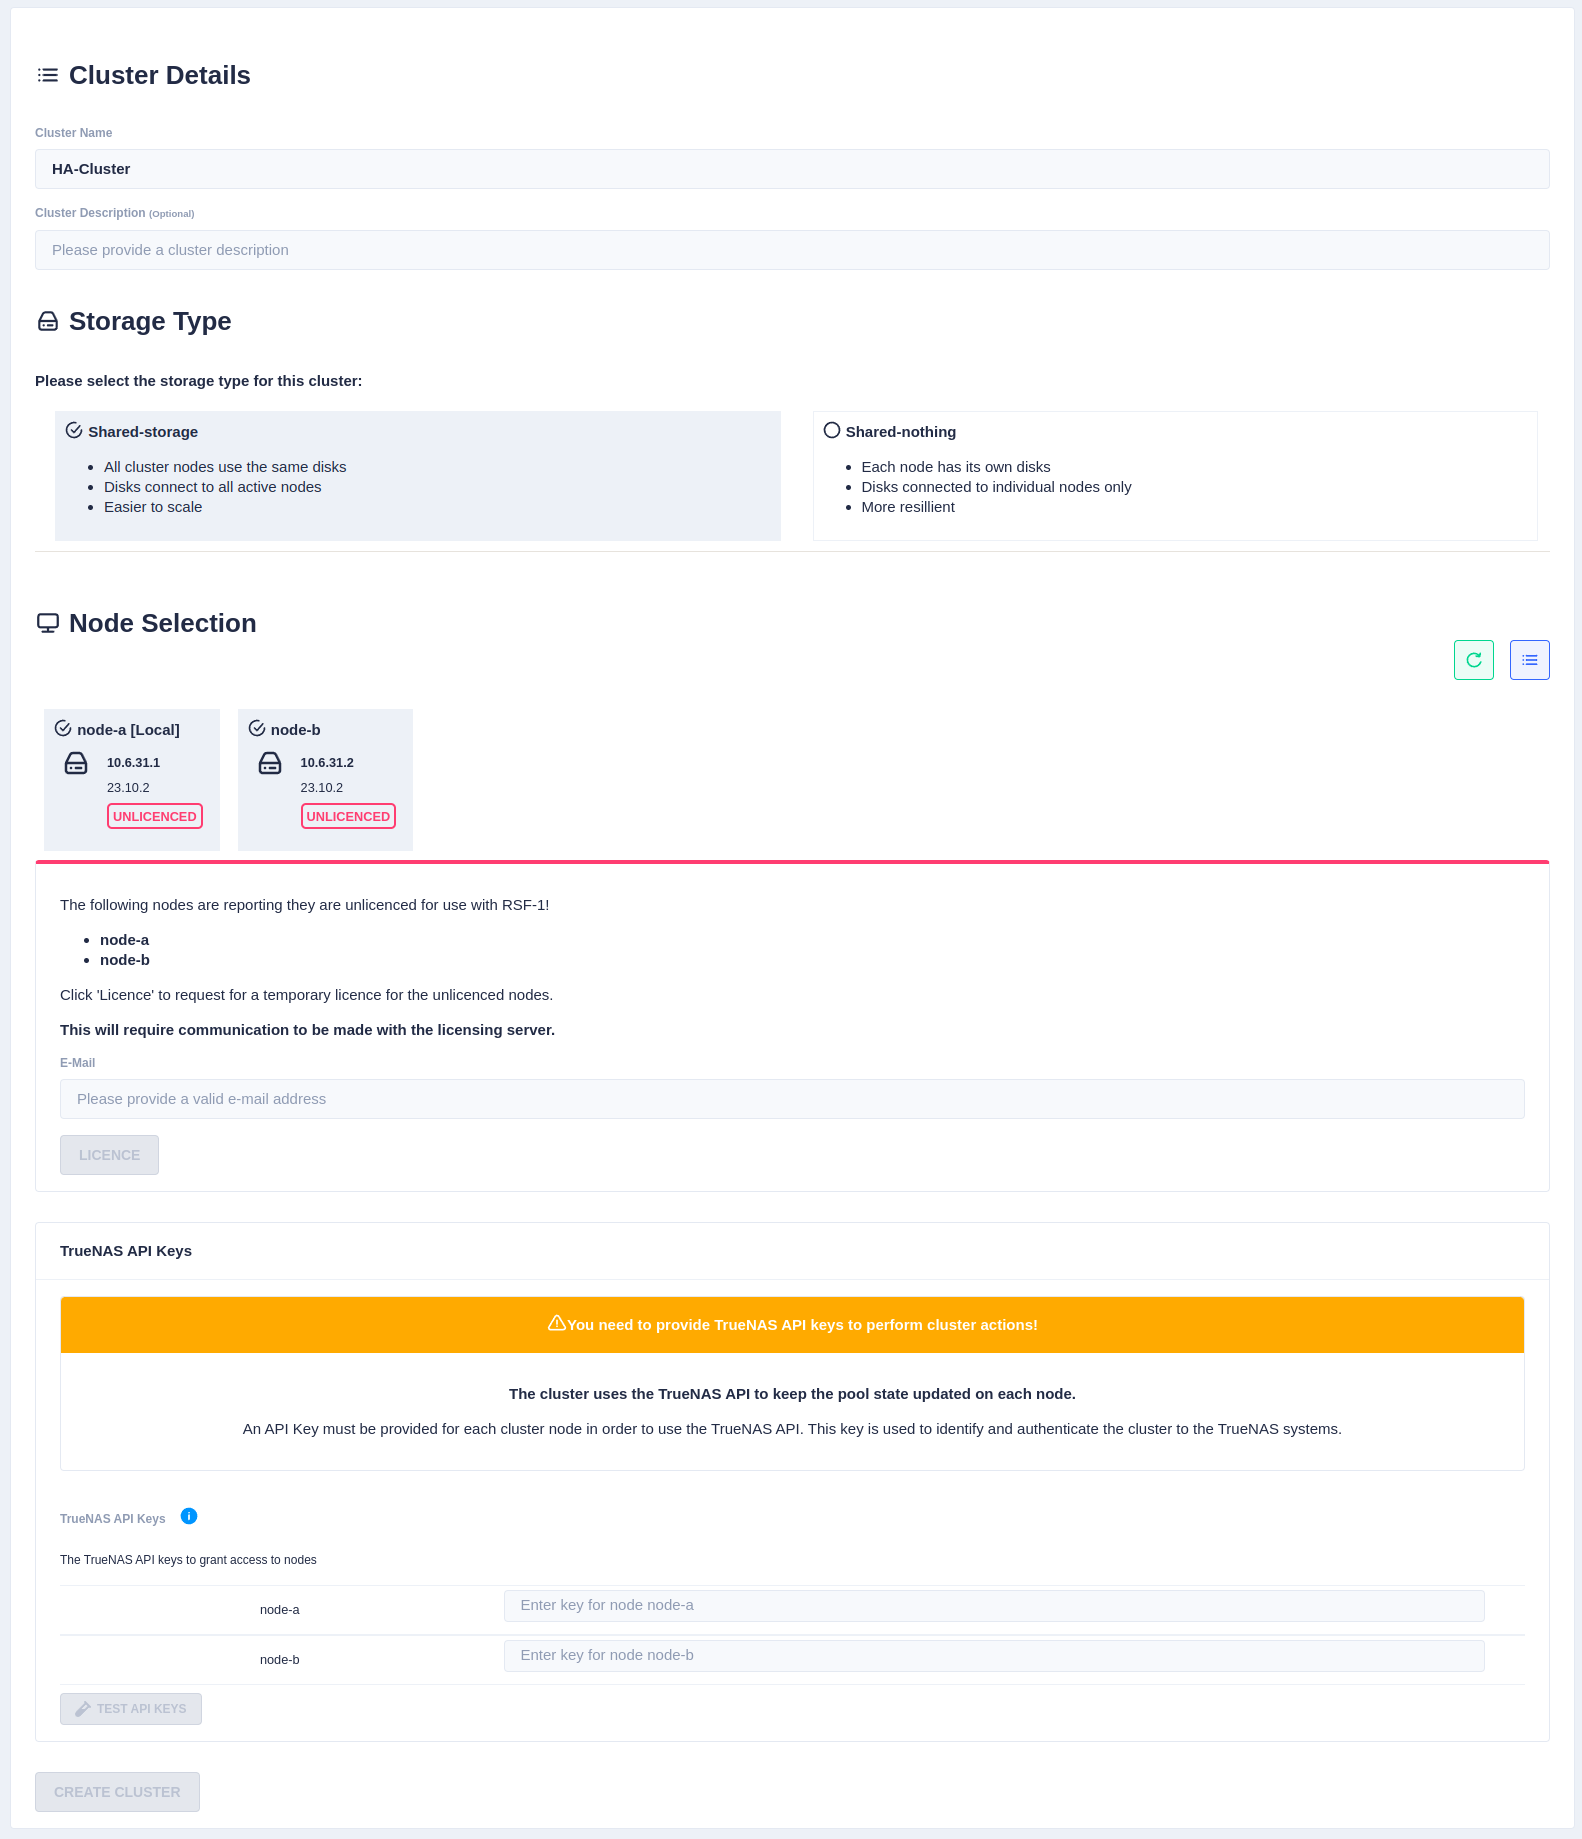
Now enter the cluster name and description, and then
select the type of cluster being created (either shared-storage or
shared-nothing).
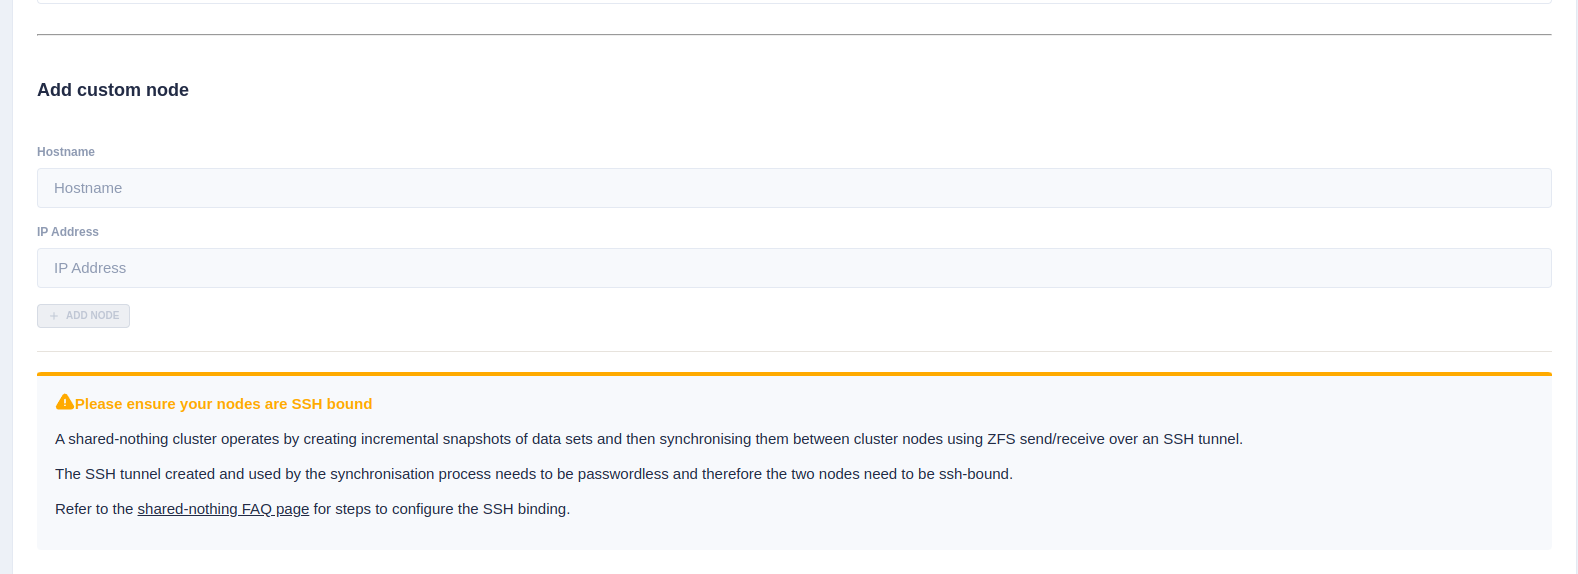
If setting up a shared-nothing cluster an additional option to add a
node manually is shown at the bottom of the page. This is because
RSF-1 will detect nodes on the local network, but for shared-nothing
clusters, the partner node could be on a separate
network/location, and therefore may not automatically be detected[^1].
Trial Licenses
If any of the selected nodes have not been licensed,
a panel is shown to obtain 45 day trial licenses:

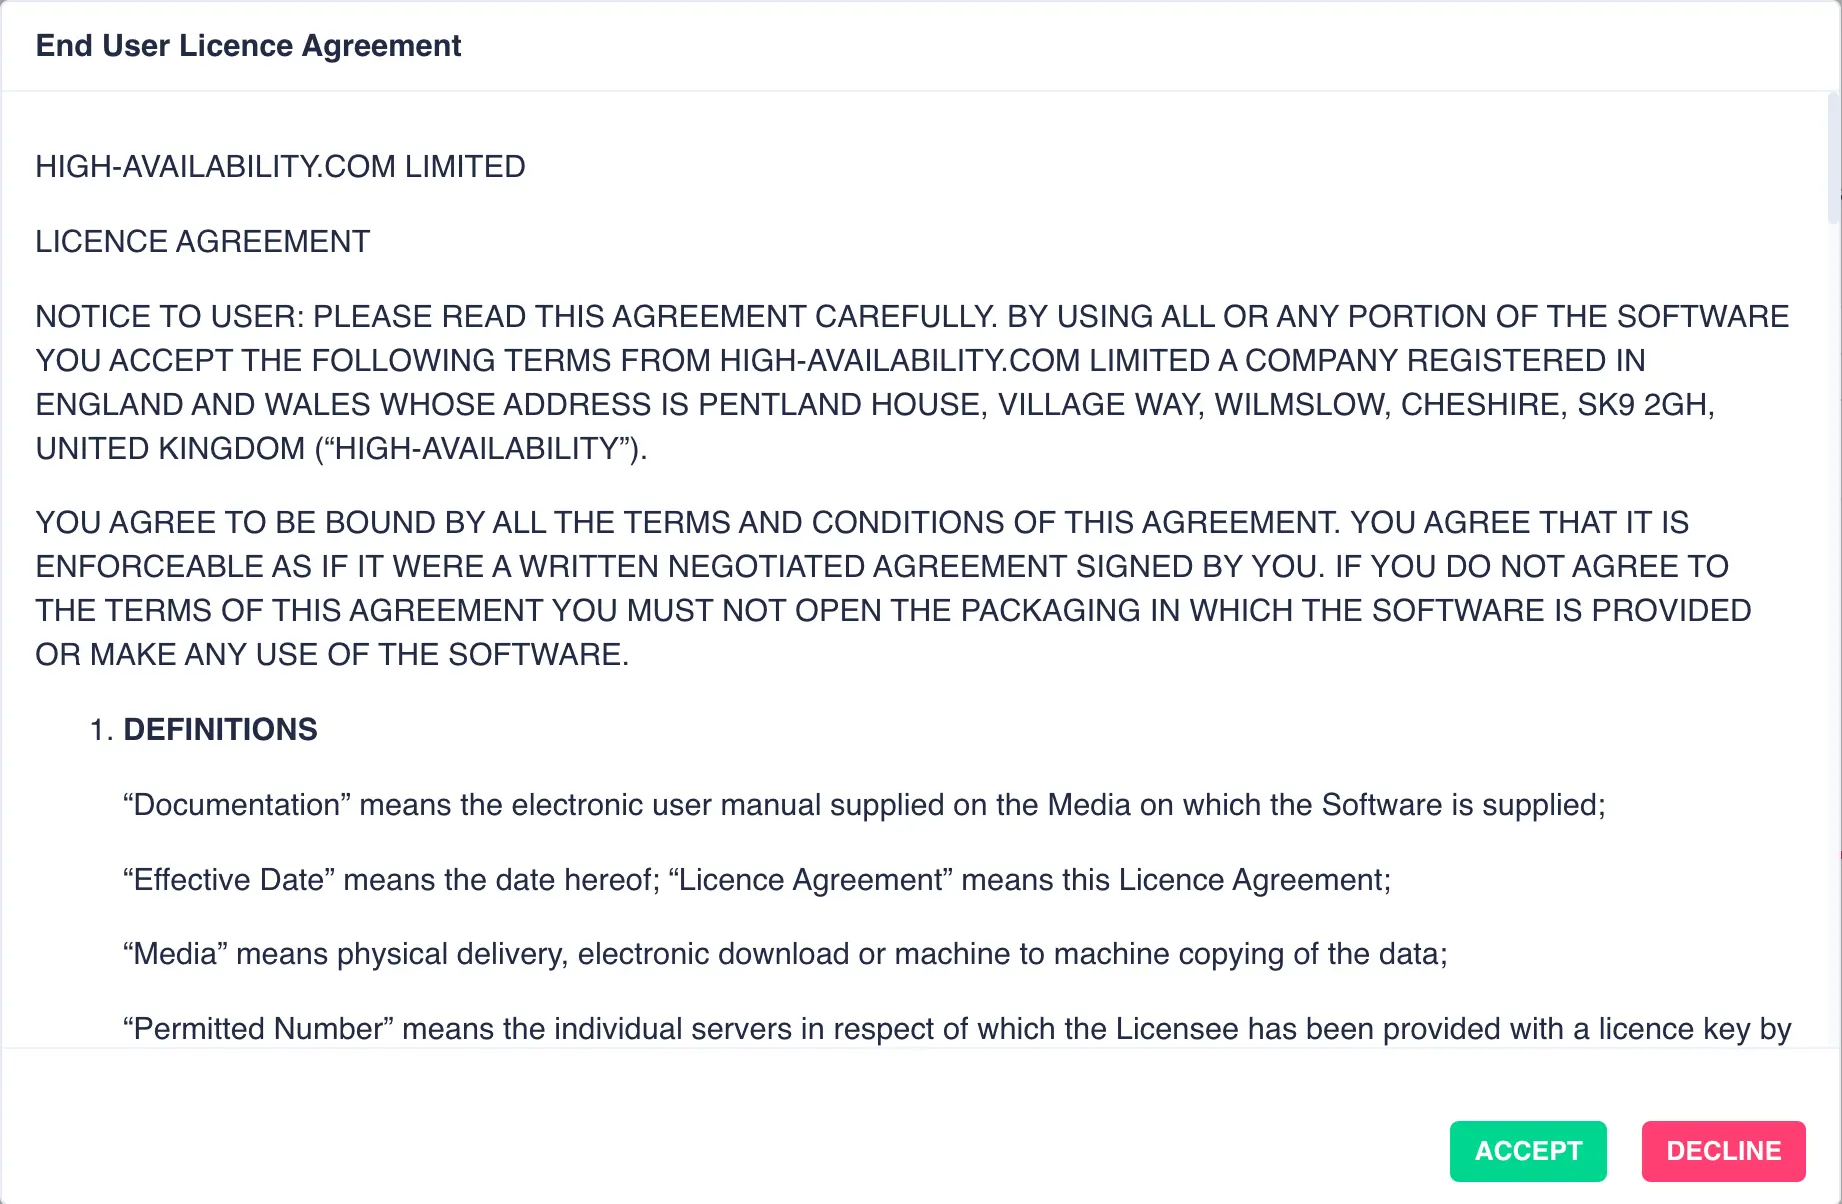
Next, the RSF-1 End User License Agreement (EULA) will
be displayed. Click ACCEPT to proceed:
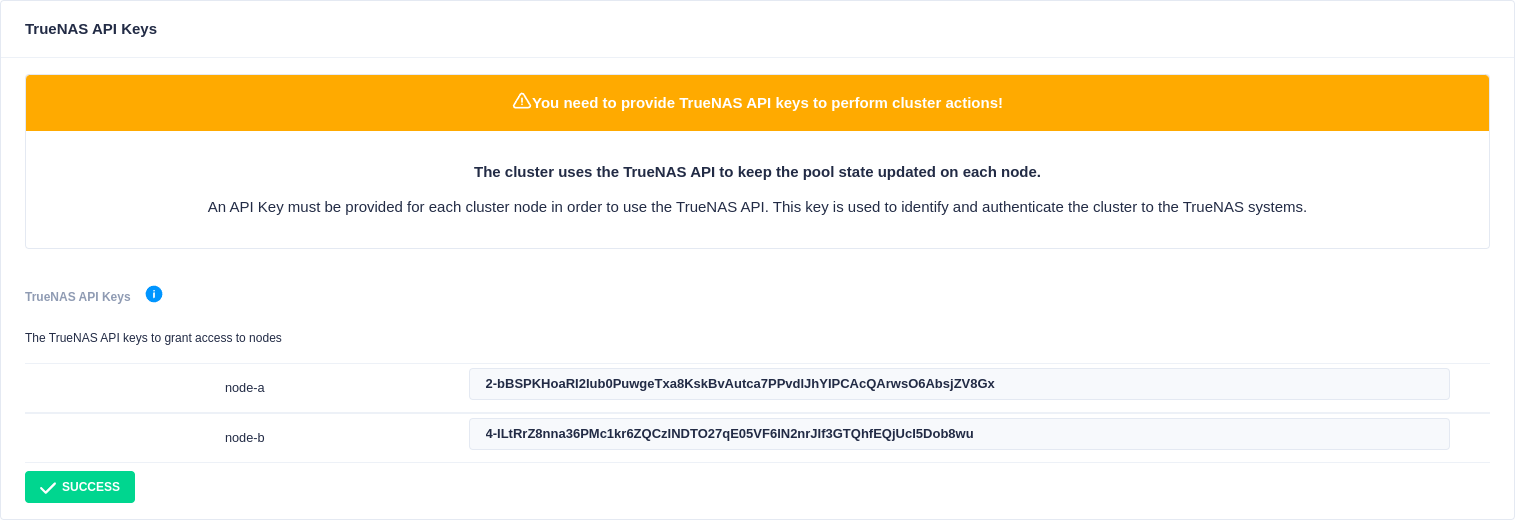
API Keys
As of version 1.11, RSF-1 requires API Keys to interact with TrueNAS to import/export pools. These can be created in the TrueNAS GUI.
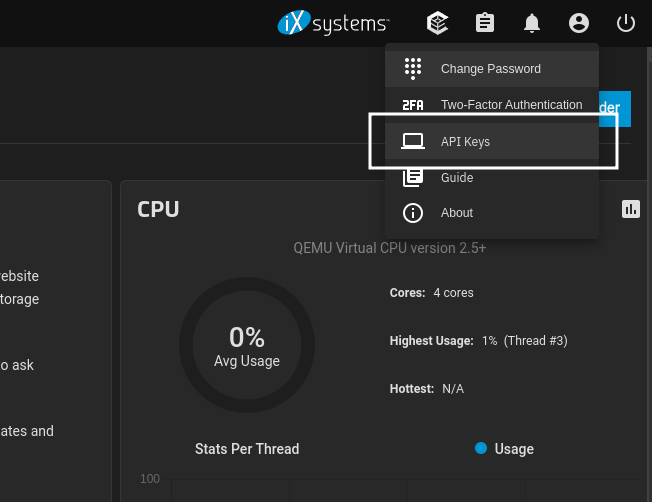
As each key is created add it to the RSF-1 API keys field for the relevant node. Once both
keys have been copied, click the TEST API KEYS button to verify the keys:
Finally click the Create Cluster button to initialize the cluster:
