Creating a ZFS HA Cluster on Linux using shared or shared-nothing storage
This guide goes through a basic setup of a RSF-1 ZFS HA cluster on Linux. Upon completion the following will be configured:
- A working Active-Active Linux cluster with either shared or shared-nothing storage
- A clustered service sharing a ZFS pool (further services can be added as required)
- A virtual hostname (VIP) by which clients should access the service; if required multiple VIPS can be assigned to a single service
Introduction
RSF-1 supports both shared and shared-nothing storage clusters.
Shared Storage
A shared storage cluster utilises an common set of storage devices that are accessible to both nodes in the cluster (housed in a shared JBOD for example). A ZFS pool is created using these devices and access to that pool is controlled by RSF-1.
Pool integrity is maintained by the cluster software using a combination of redundant heartbeating and PGR3 disk reservations to ensures any pool in a shared storage cluster can only be accessed by a single node at any one time.
Shared-Nothing
A shared-nothing cluster consists of two nodes, each with their own locally accessible ZFS storage pool residing on non shared storage:
Data is replicated between nodes by an HA synchronisation process. Replication is always done from the active to the passive node, where the active node is the one serving out the pool to clients:
Should a failover occur then synchronisation is effectively reversed:
Before creating pools for shared nothing clusters
-
To be eligible for clustering the storage pools must have the same name on each node in the cluster
-
It is strongly recommended the pools are of equal size, otherwise the smaller of the two runs the risk of depleting all available space during synchronization
Download cluster software
If not already done so, download and install the RSF-1 cluster software onto each cluster node. More information can be found here.
Initial connection and user creation
Prerequisites
Shared Nothing
If setting up ashared-nothing cluster, both nodes require
passwordless ssh access to each other using the root account; this is
required for ZFS replication and must be the root user. For further
information please see the documentation on configuring an ssh connection
here.
Firewall configuration
Ensure any firewalls in the cluster environment have the following ports open before attempting configuration:On systems running firewalld (RHEL based systems for example), open the relevant
RSF-1 ports by issuing the following commands
on each node in the cluster to open the required RSF-1 ports in the active zone (in this example the public zone is used):
firewall-cmd --permanent --zone=public --add-port={1195/tcp,1195/udp,4330/tcp,4331/tcp,8330/tcp}
firewall-cmd --reload
firewalld documentation for further information.
Once the cluster software is installed on all cluster nodes, navigate to the RSF-1 GUI on any one of the nodes on port 8330:
You will then be presented with the welcome screen. Click BEGIN SETUP to start configuring the cluster:
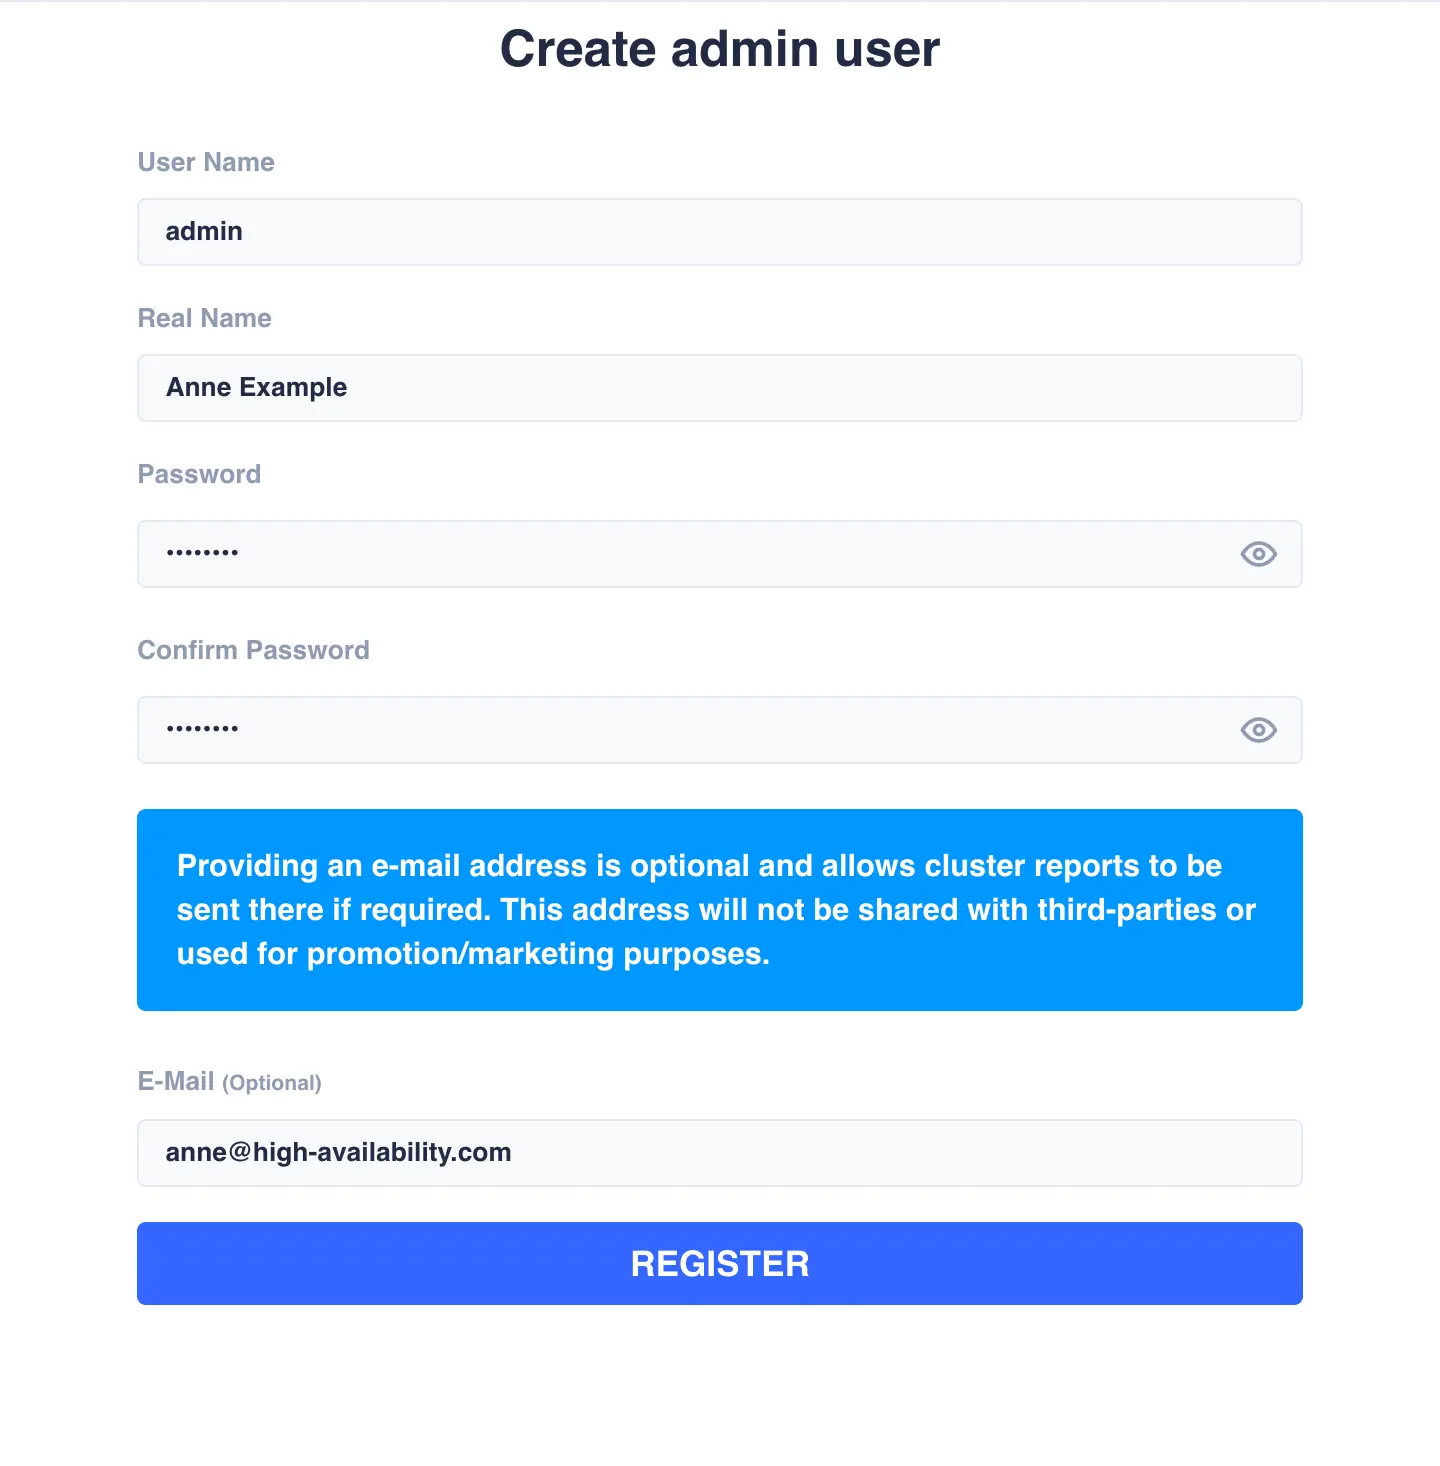
Create an admin user account for the GUI.
Enter the information in the provided fields and click the
REGISTER button when ready:
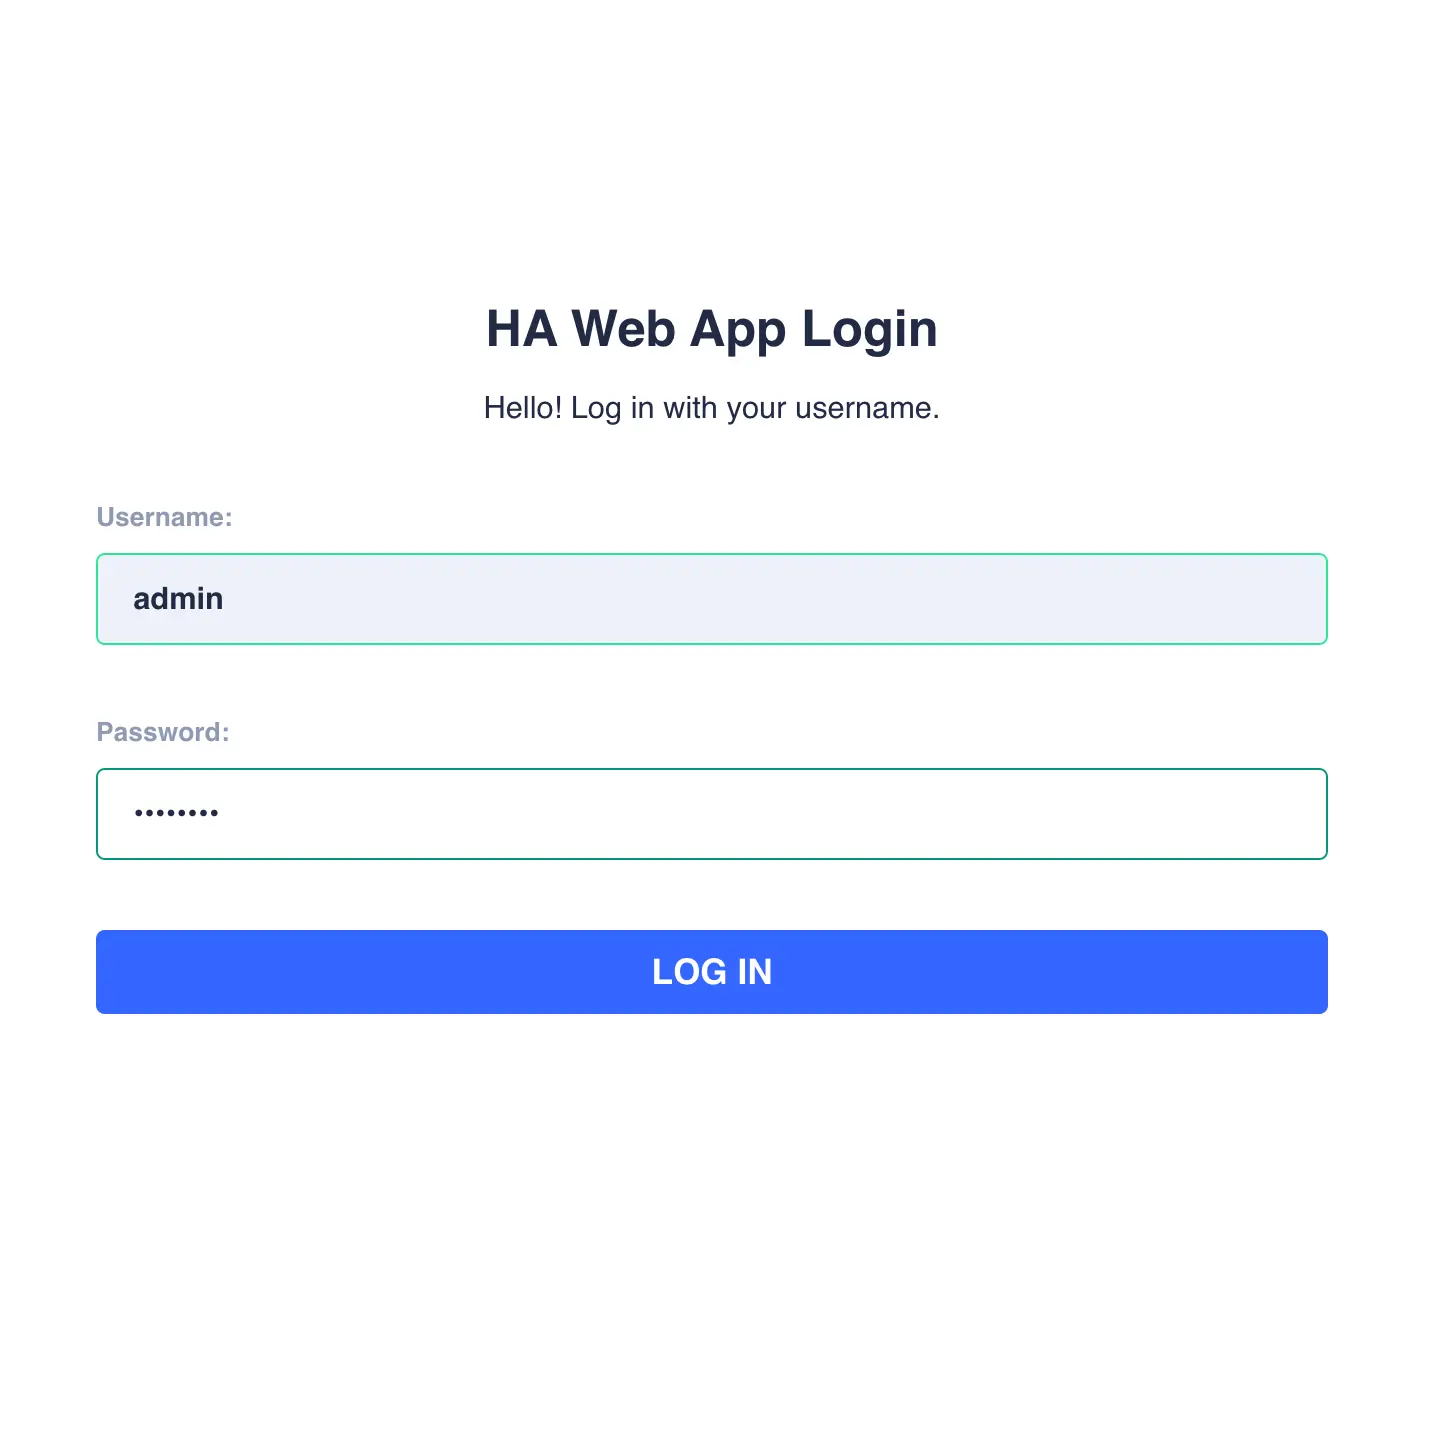
Once you click the REGISTER button, the admin user account will be
created and you will be redirected to the login screen. Login with the
username and password just created:
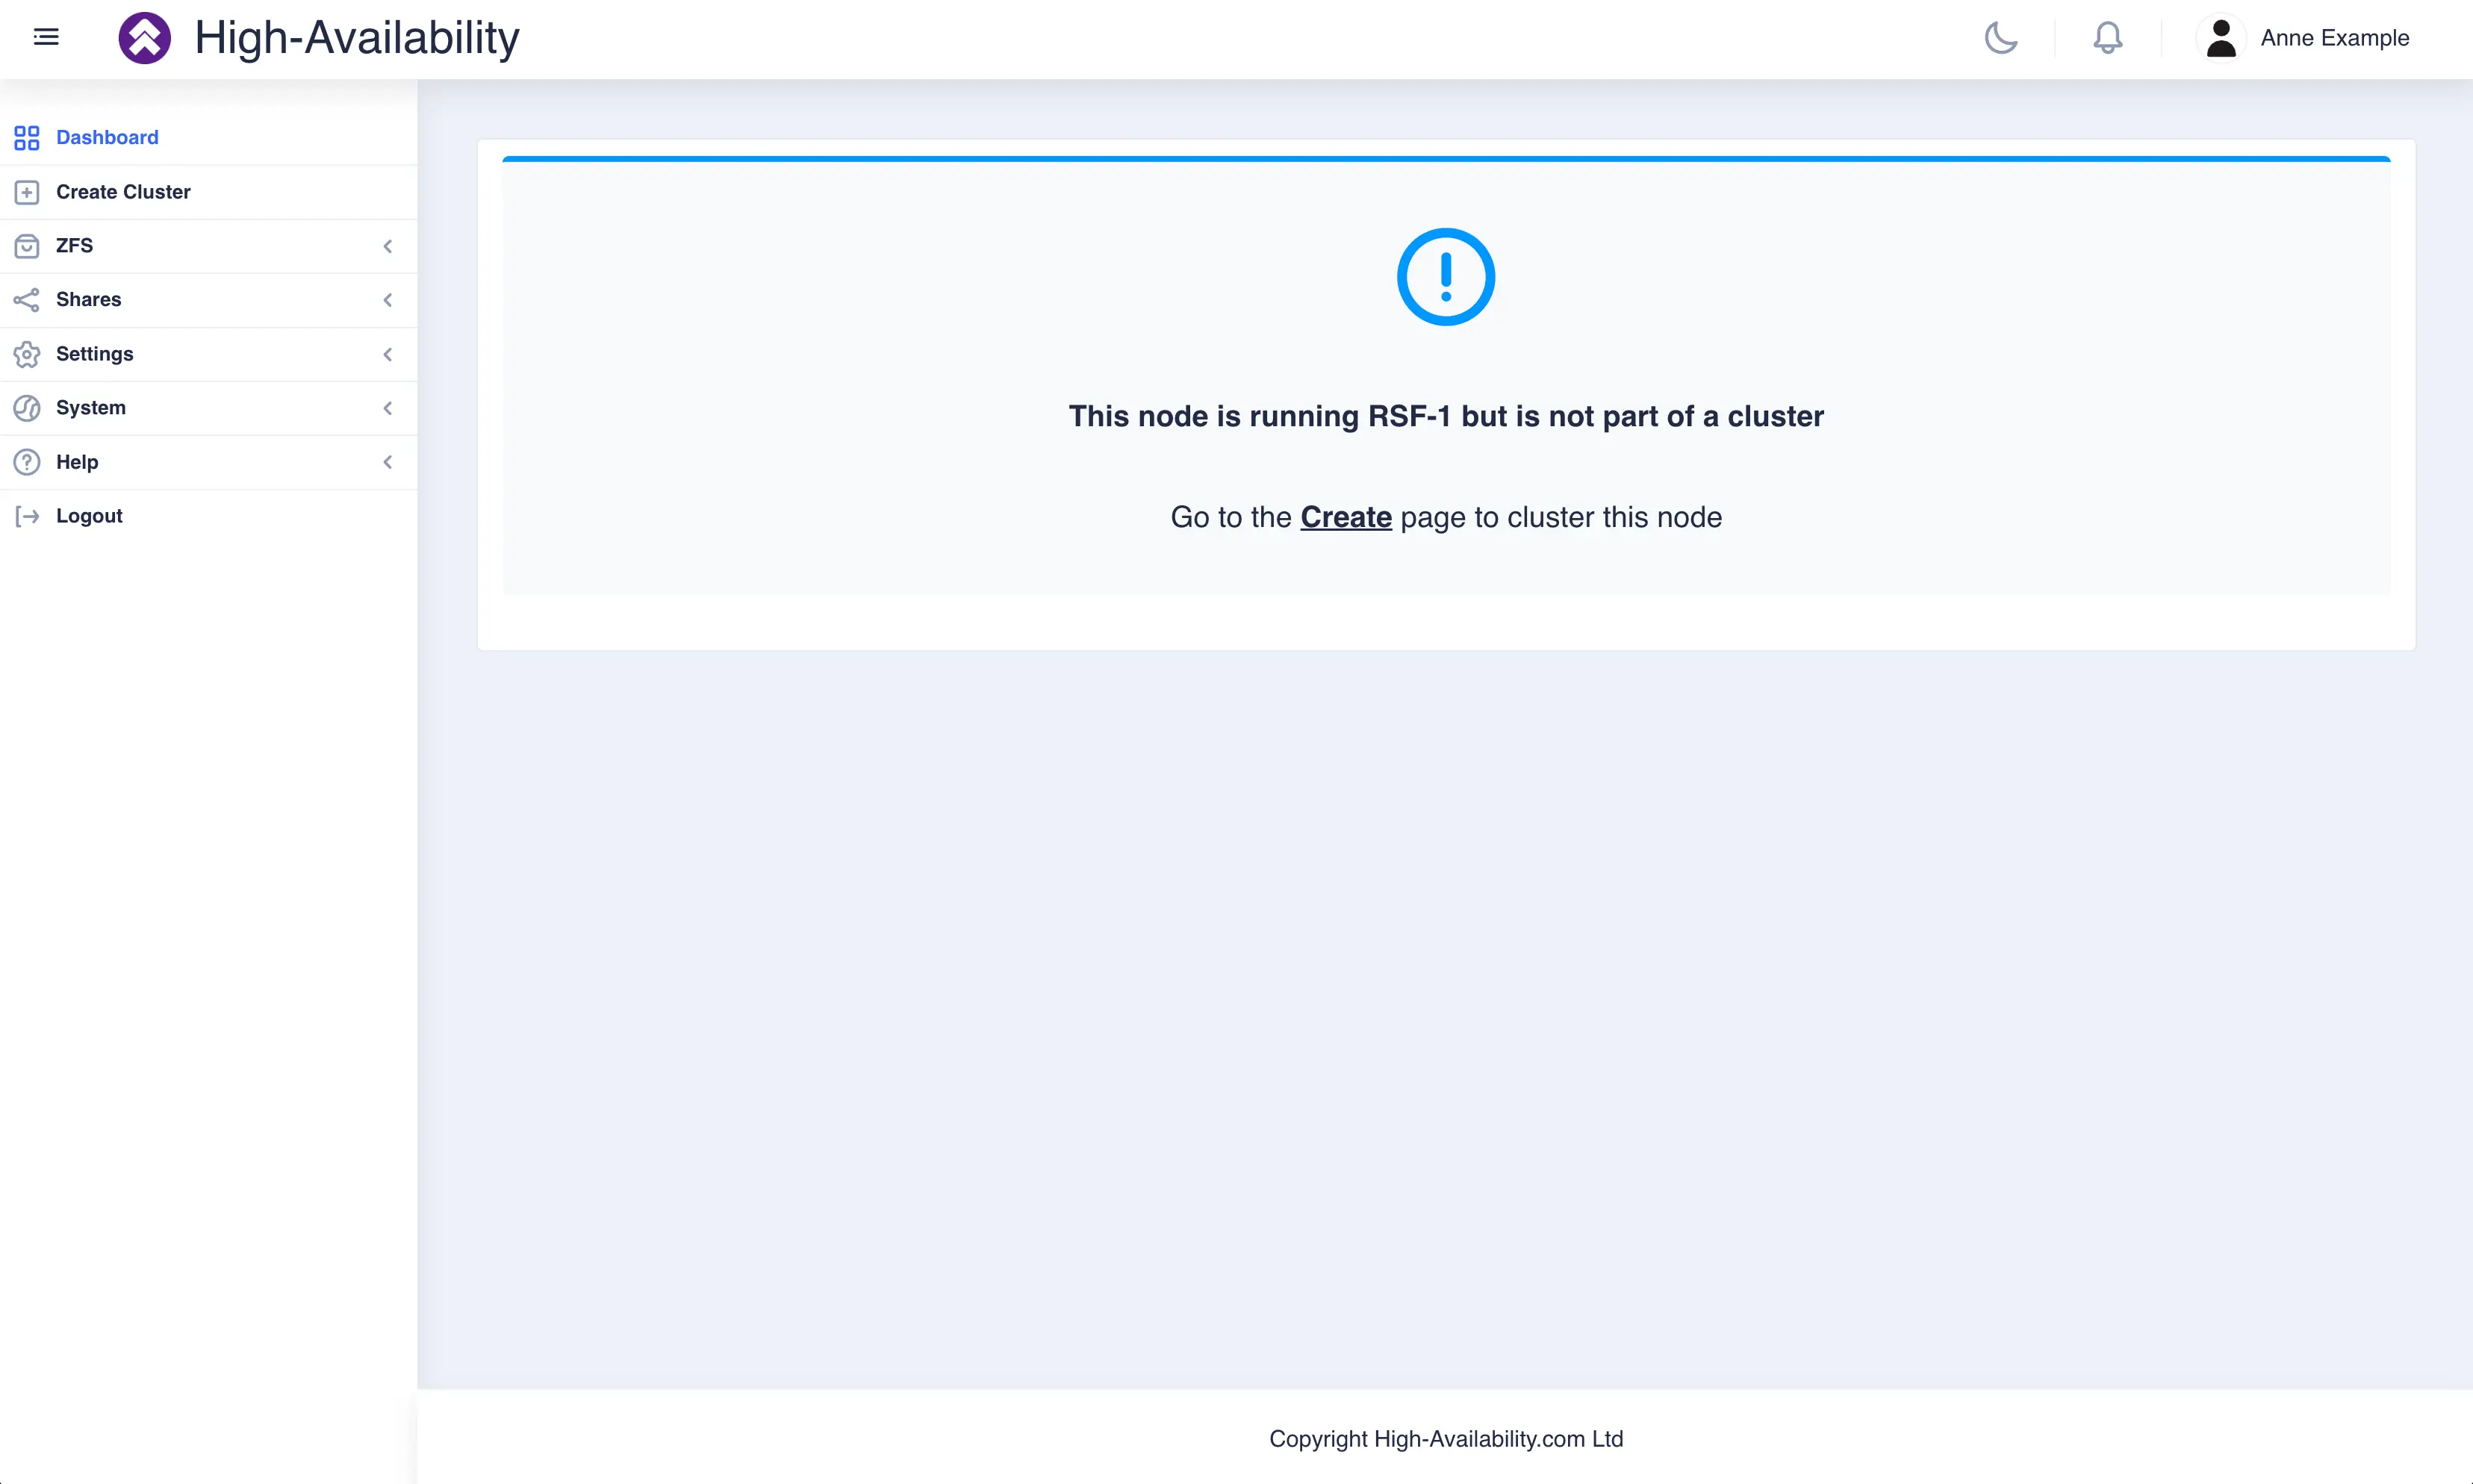
Once logged in the cluster uninitialized page is displayed:
Configuration and Licensing
To begin configuration, click on Create option on the
side-menu (or the shortcut shown on the uninitialized page).
Editing your /etc/hosts file
Before continuing, ensure the /etc/hosts
file is configured correctly on both nodes. Hostnames cannot
be directed to 127.0.0.1, and both nodes should be
resolvable. Here is a correctly configured hosts file for two
example nodes, node-a and node-b:
The Cluster Create page scans for clusterable nodes (those running RSF-1 that are not yet part of a cluster) and presents them for selection. If any nodes are unlicensed then an additional panel will be included to request 45 day trial licenses:
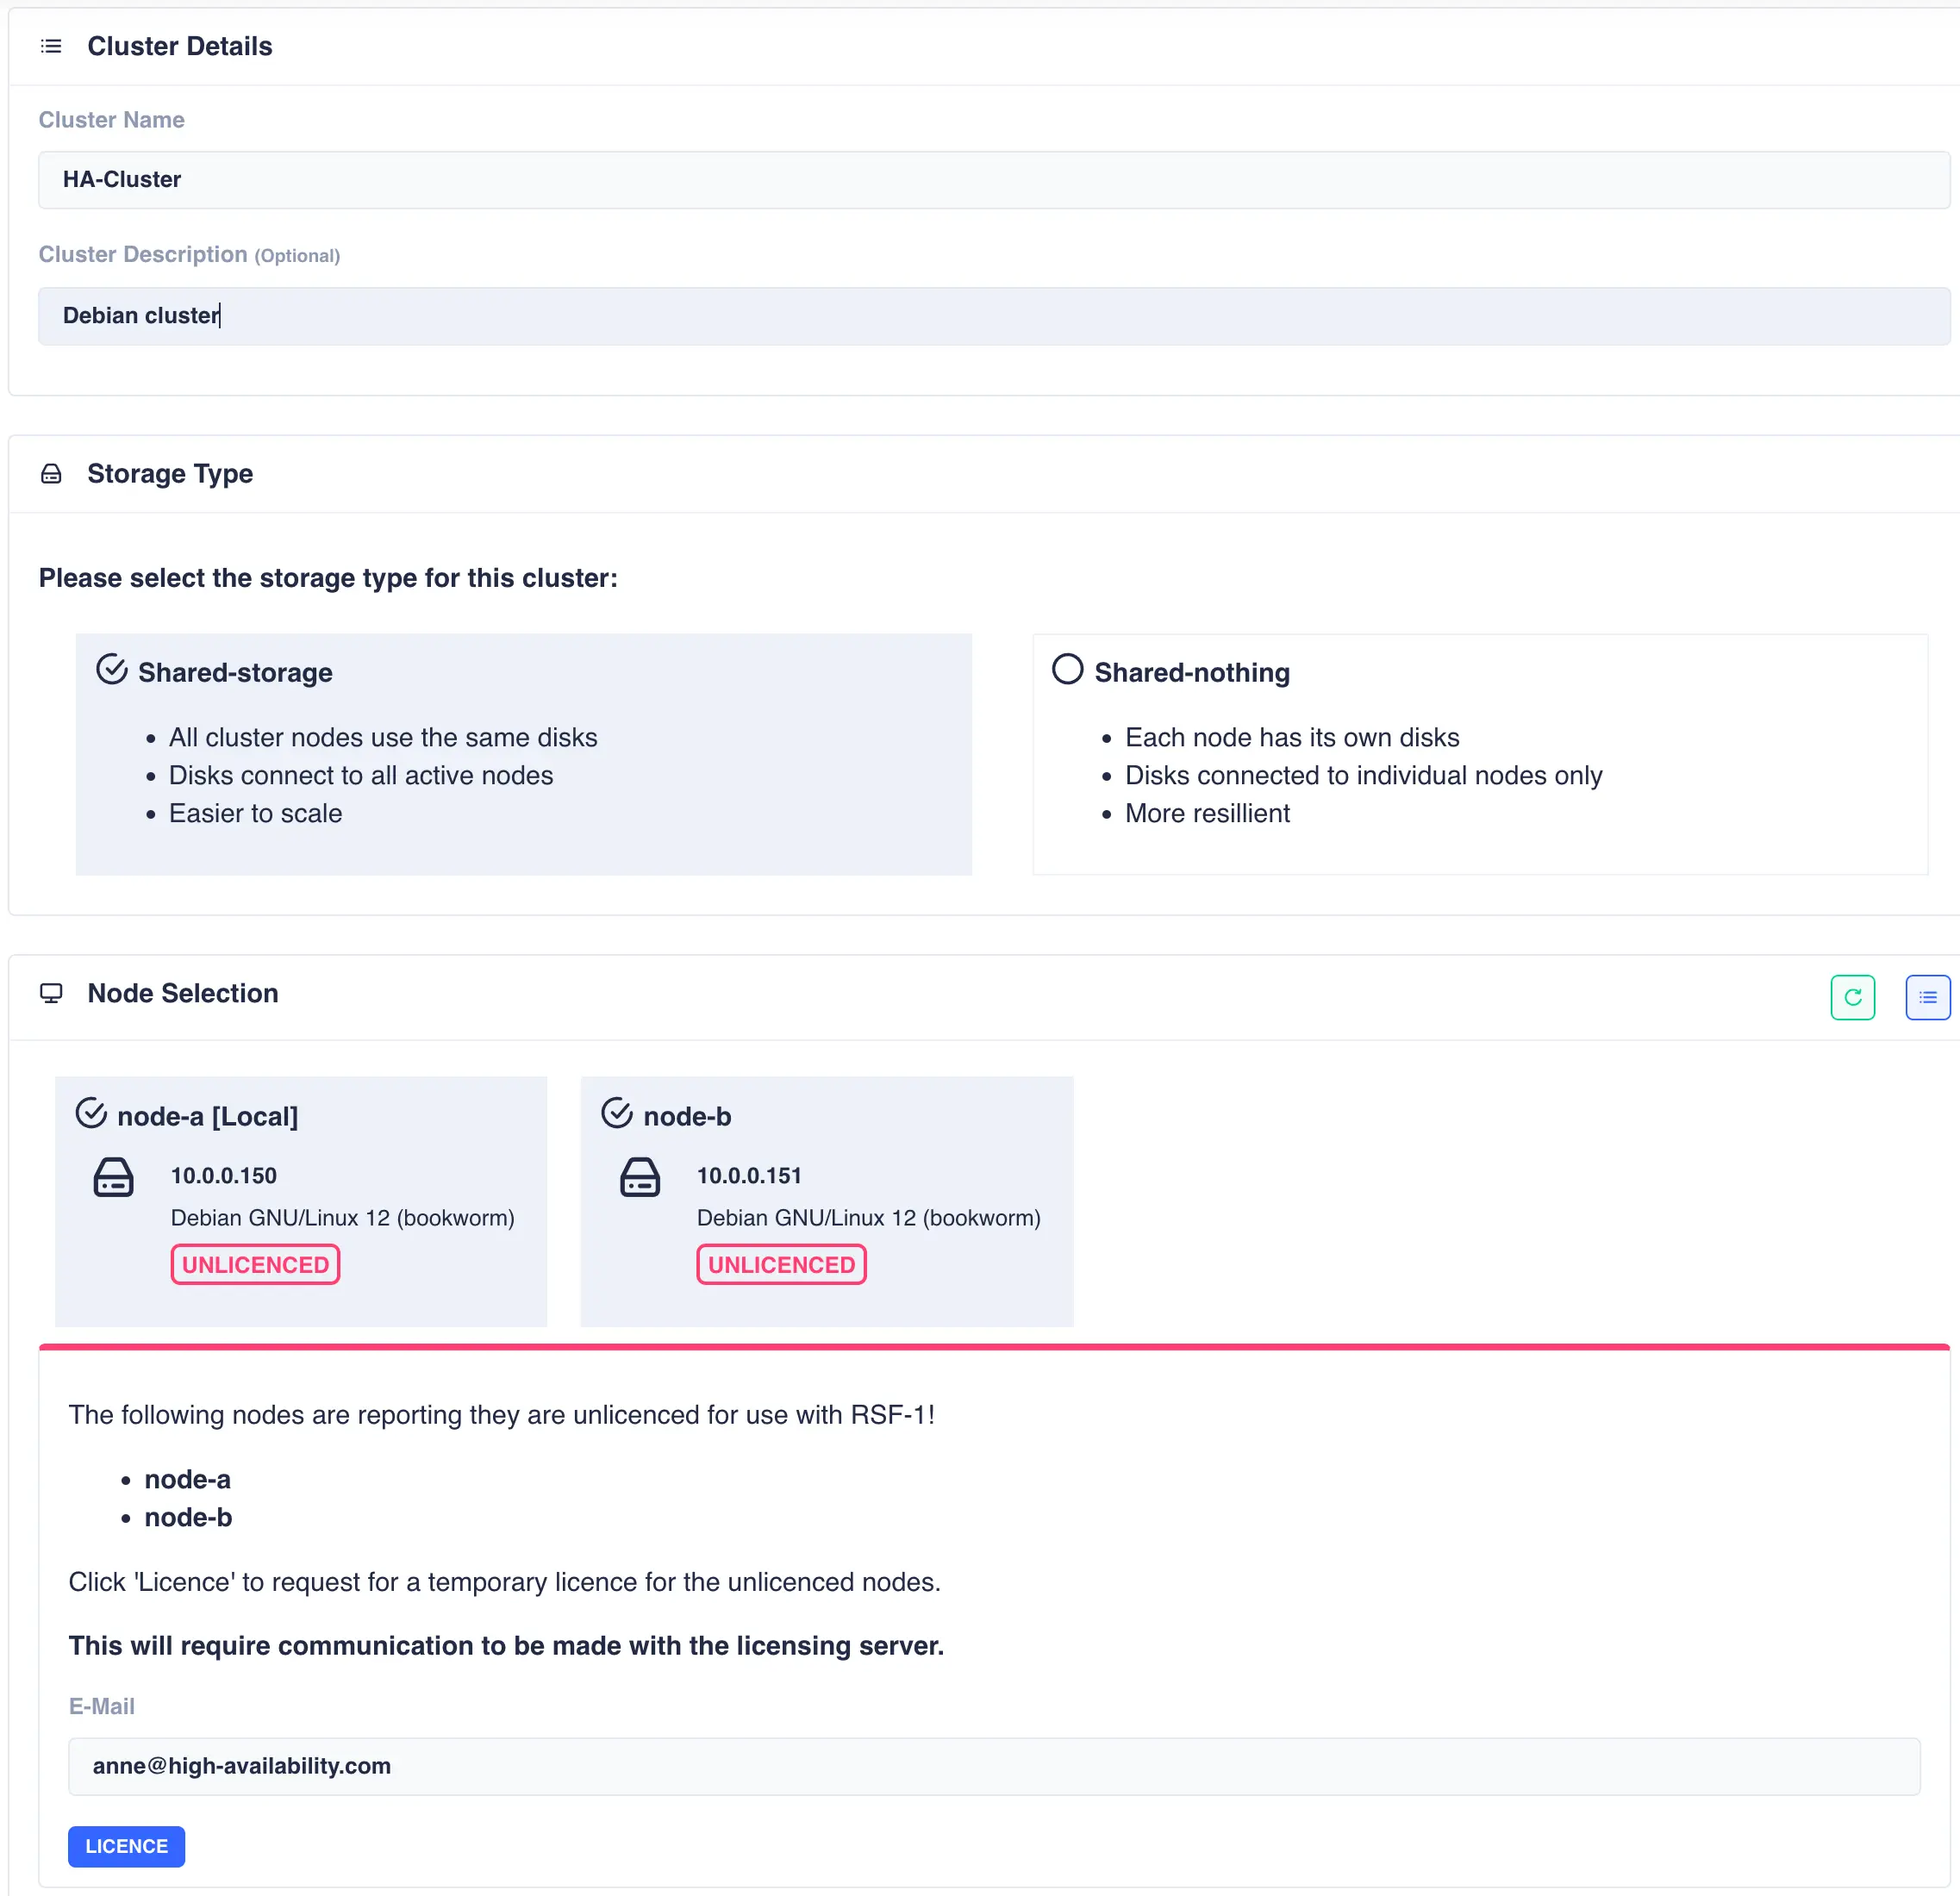
Now enter the cluster name and description, and then
select the type of cluster being created (either shared-storage or
shared-nothing).
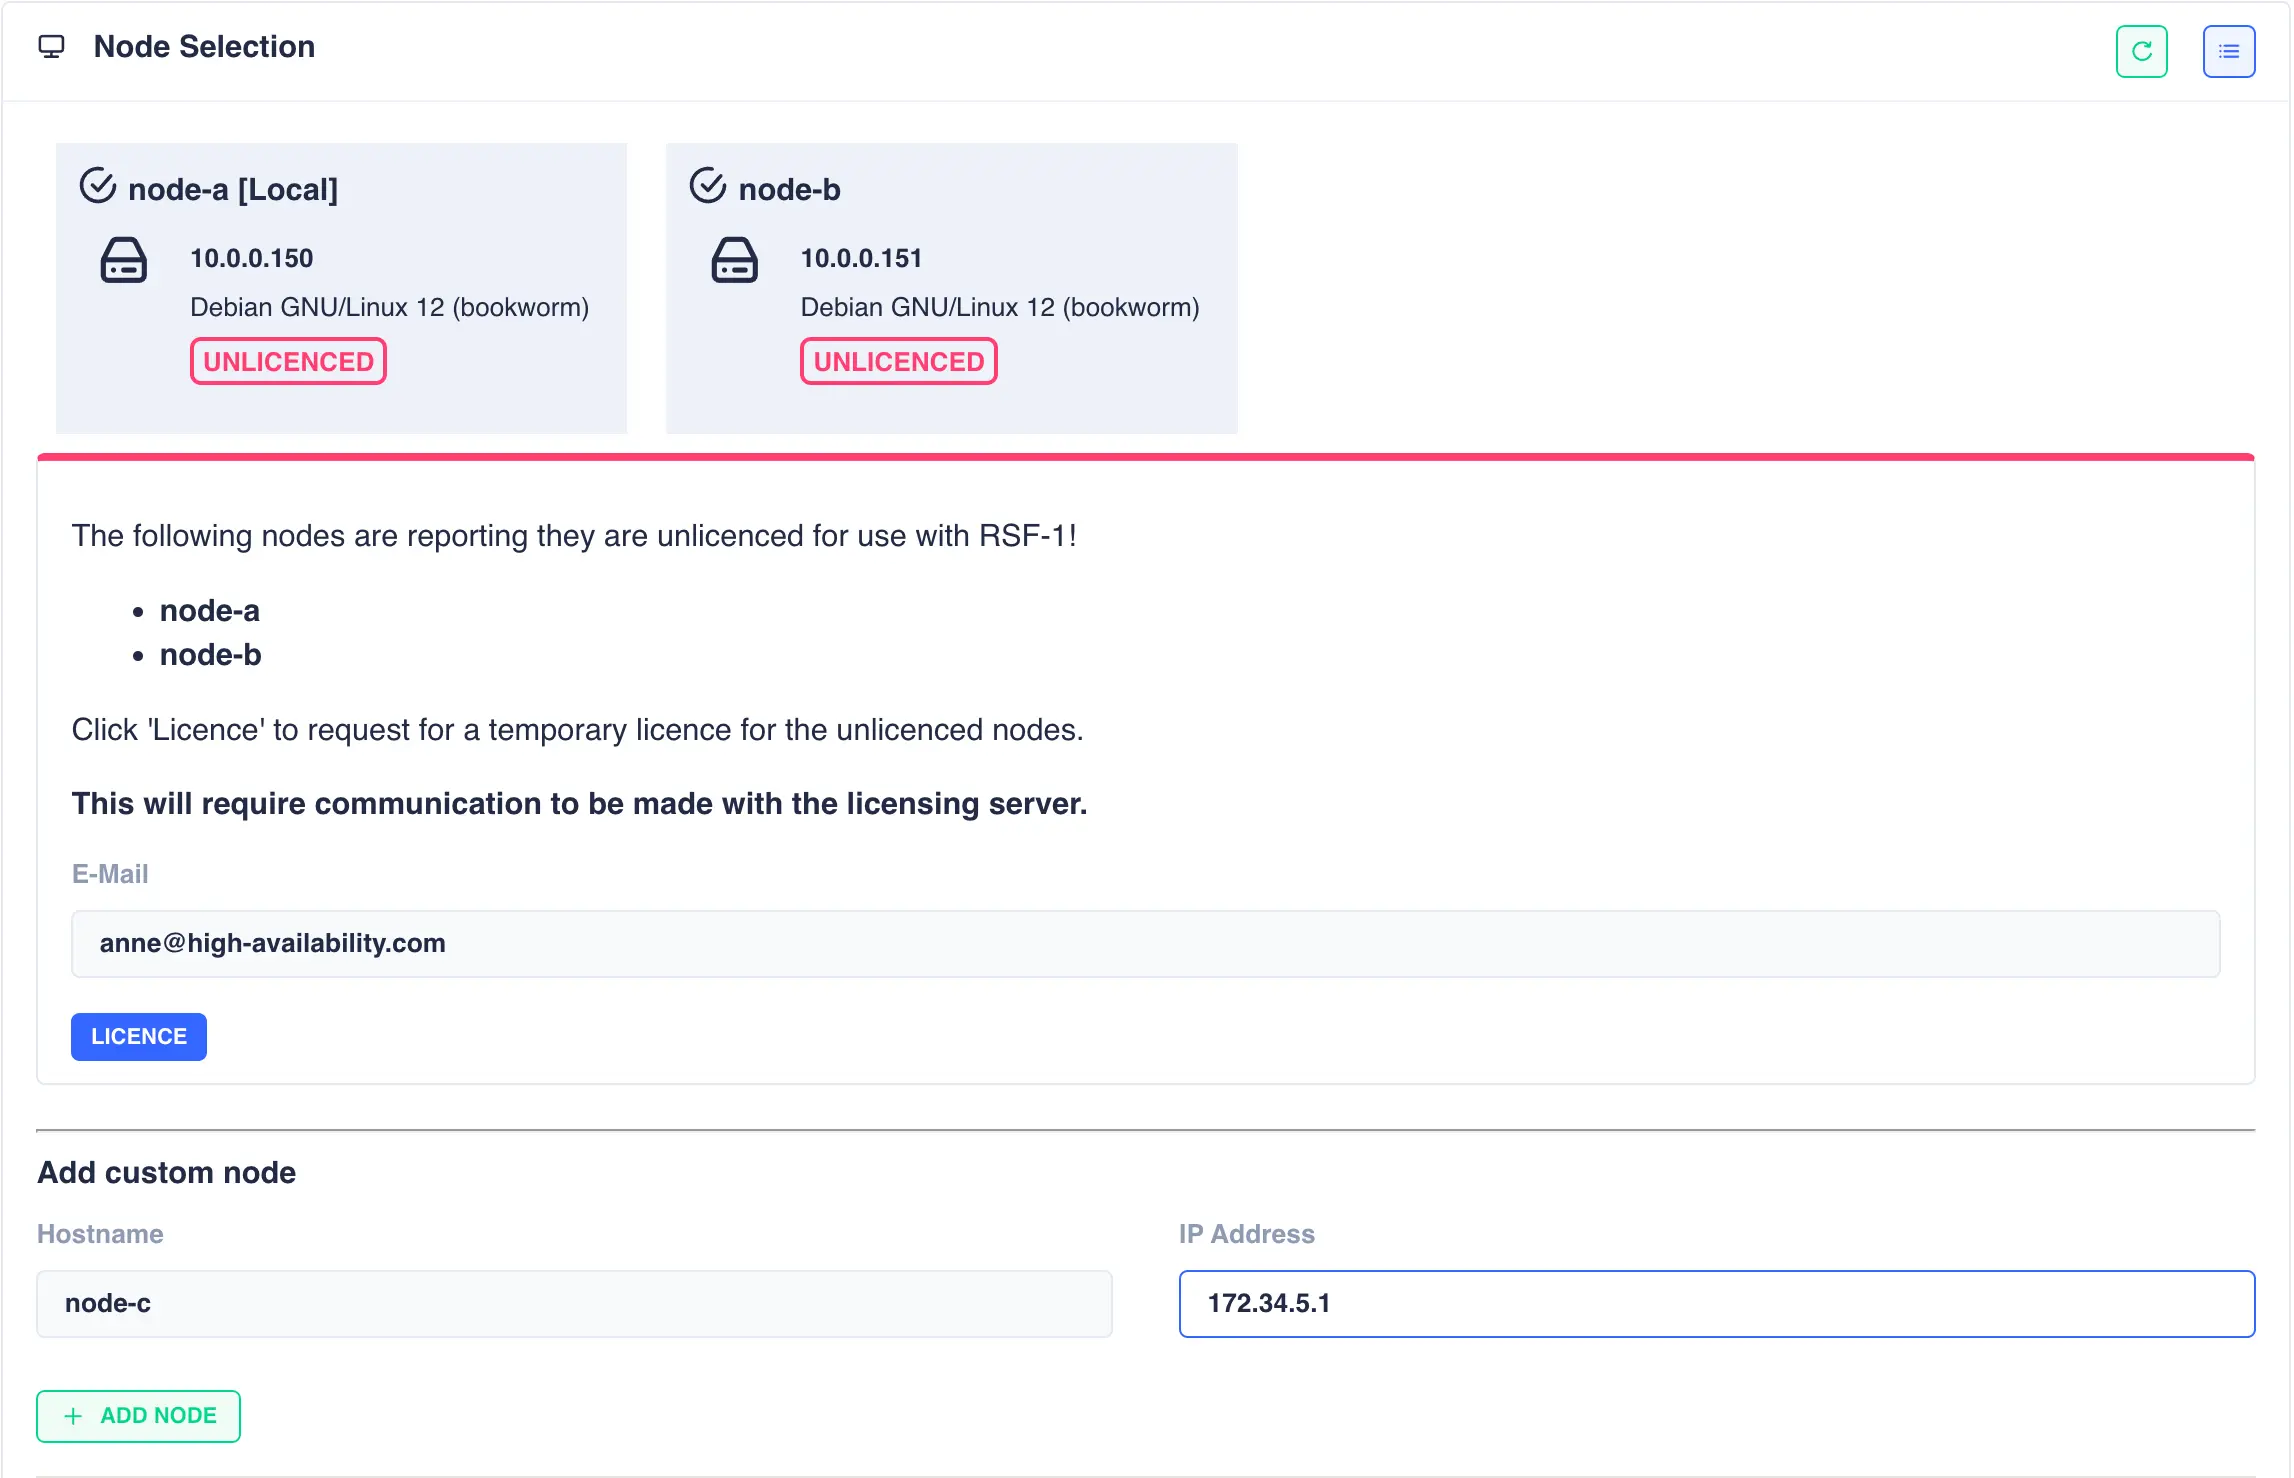
Shared-Nothing: Adding non-local nodes for shared nothing clusters
For a shared-nothing cluster an additional panel is included to allow manual entry
of a cluster node.
This option is provided as RSF-1 only detects unclustered nodes on the local network
and for shared-nothing clusters it is often the case that nodes are located on remote
networks and cannot be detected automatically1.
In this case fill in the host name and IP address of the remote node and click the + ADD NODE button:
The node will then be availble to select as the secondary node in the cluster:

Obtain trial licenses
Once the cluster nodes have been selected click the LICENCE button to obtain 45 day trial licenses directly
from the High-Availability license server. The RSF-1 End User License Agreement (EULA) will
then be displayed. Click ACCEPT to proceed:

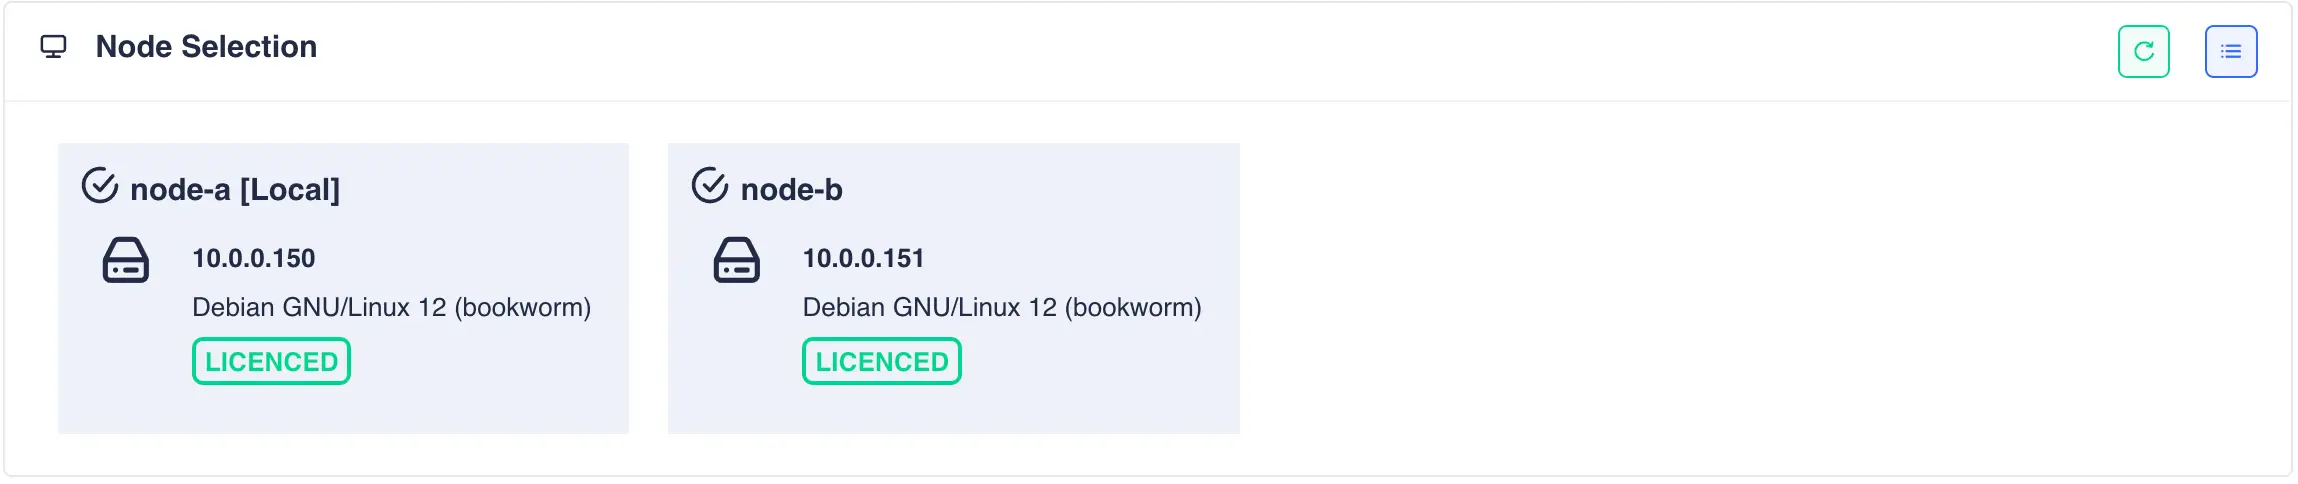
Once the licensing process has completed click the refresh button on the node selection panel to update the license status:
Shared-Nothing: Configure SSH tunnel between nodes
For shared nothing clusters an additional step is required to configure a bi-directional ssh tunnel between the two nodes. This tunnel is used to transfer snapshots between the two cluster nodes. A panel with pre-filled out values consisting of the cluster node names is presented:
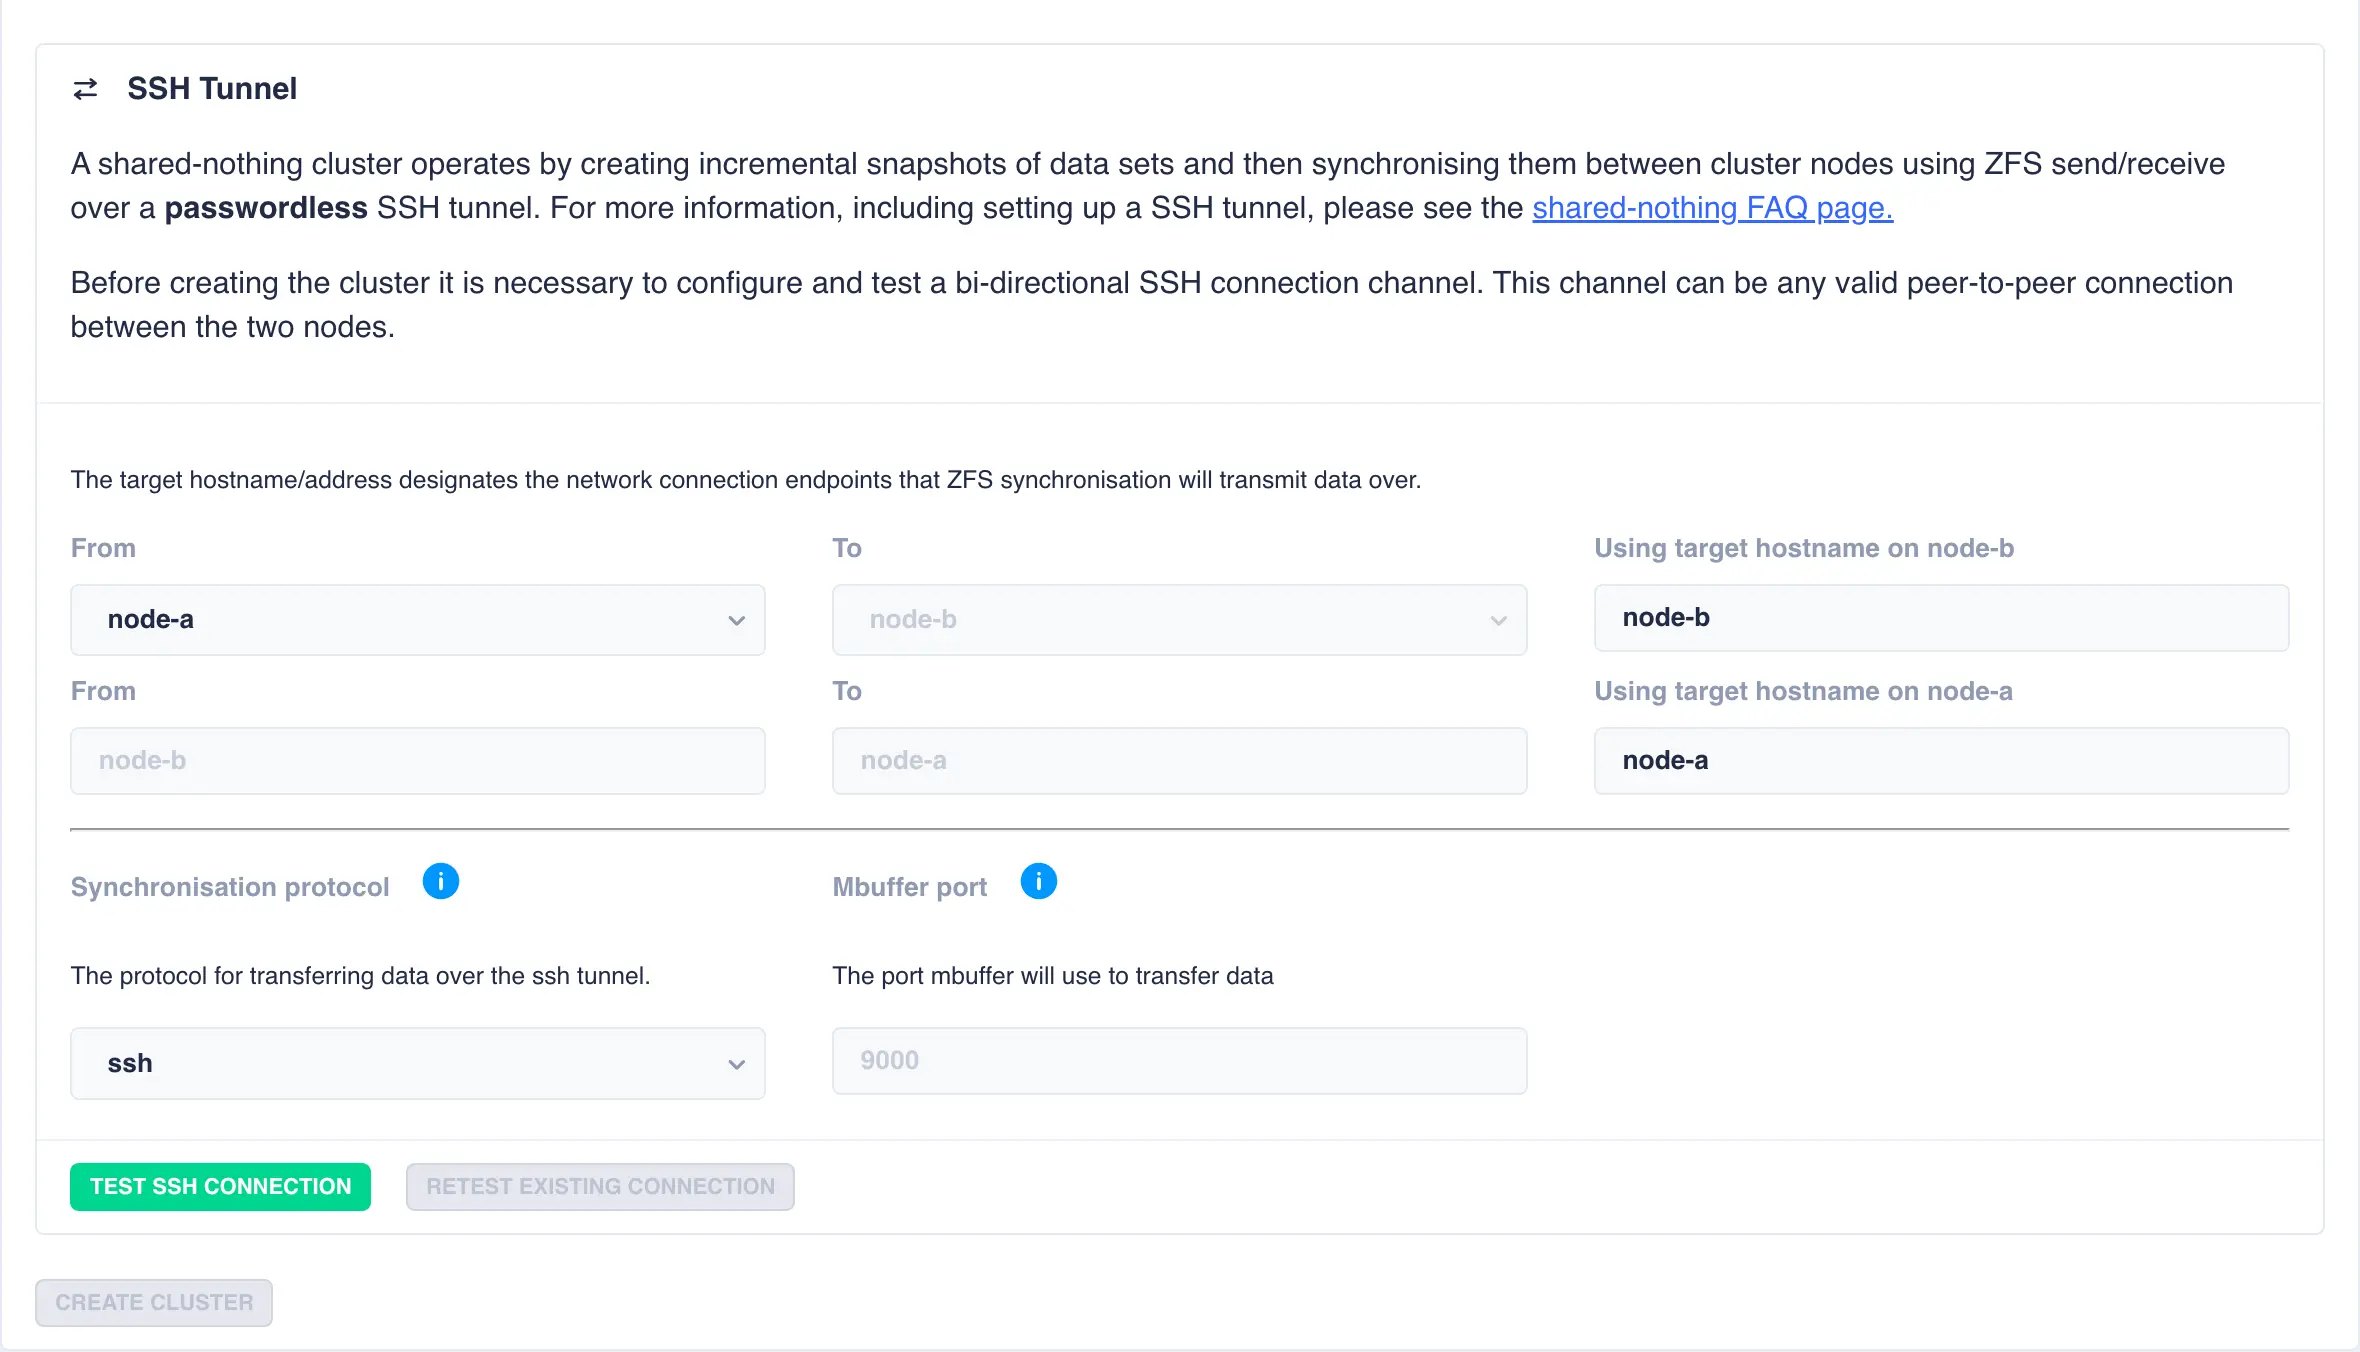
Using the default values of the cluster node names snapshot data will be transfered over
primary hosts network. However, this can be changed by specifying a different end point
for the target hostnames. For example, if an additional network is configured between the
two nodes using the addresses node-a-priv and node-b-priv respectively then this would be
configured thus:

By default ssh is used as the transport protocol as it encrypts/decrypts data during
snapshot transfer.
If data encryption is not required then mbuffer is offered as an alternative
as it makes much better utilisation of the available bandwidth:

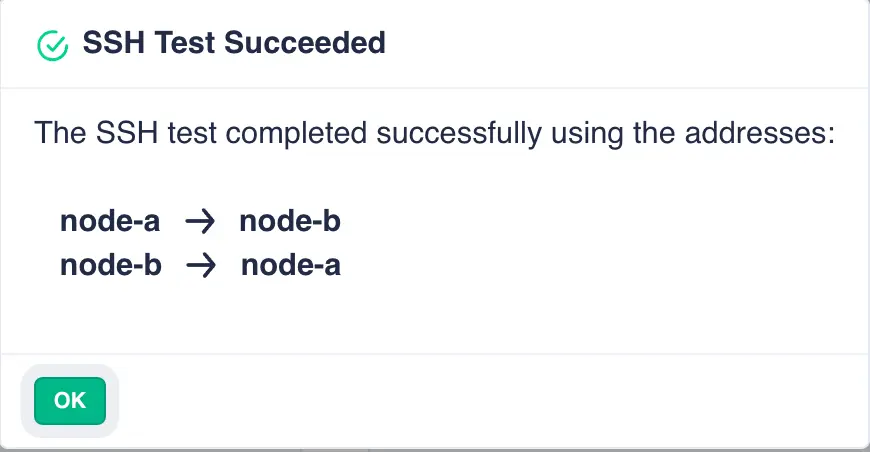
Next click the TEST SSH CONNECTION button to confirm the ssh tunnel is operating correctly:
Note
Once the cluster is created the SSH connections settings can be changed
from the Settings->Shared Nothing page.
Create and initialise the cluster
Click the CREATE CLUSTER button to cluster the nodes together and create an
initial network heartbeat between them over the hosts network:

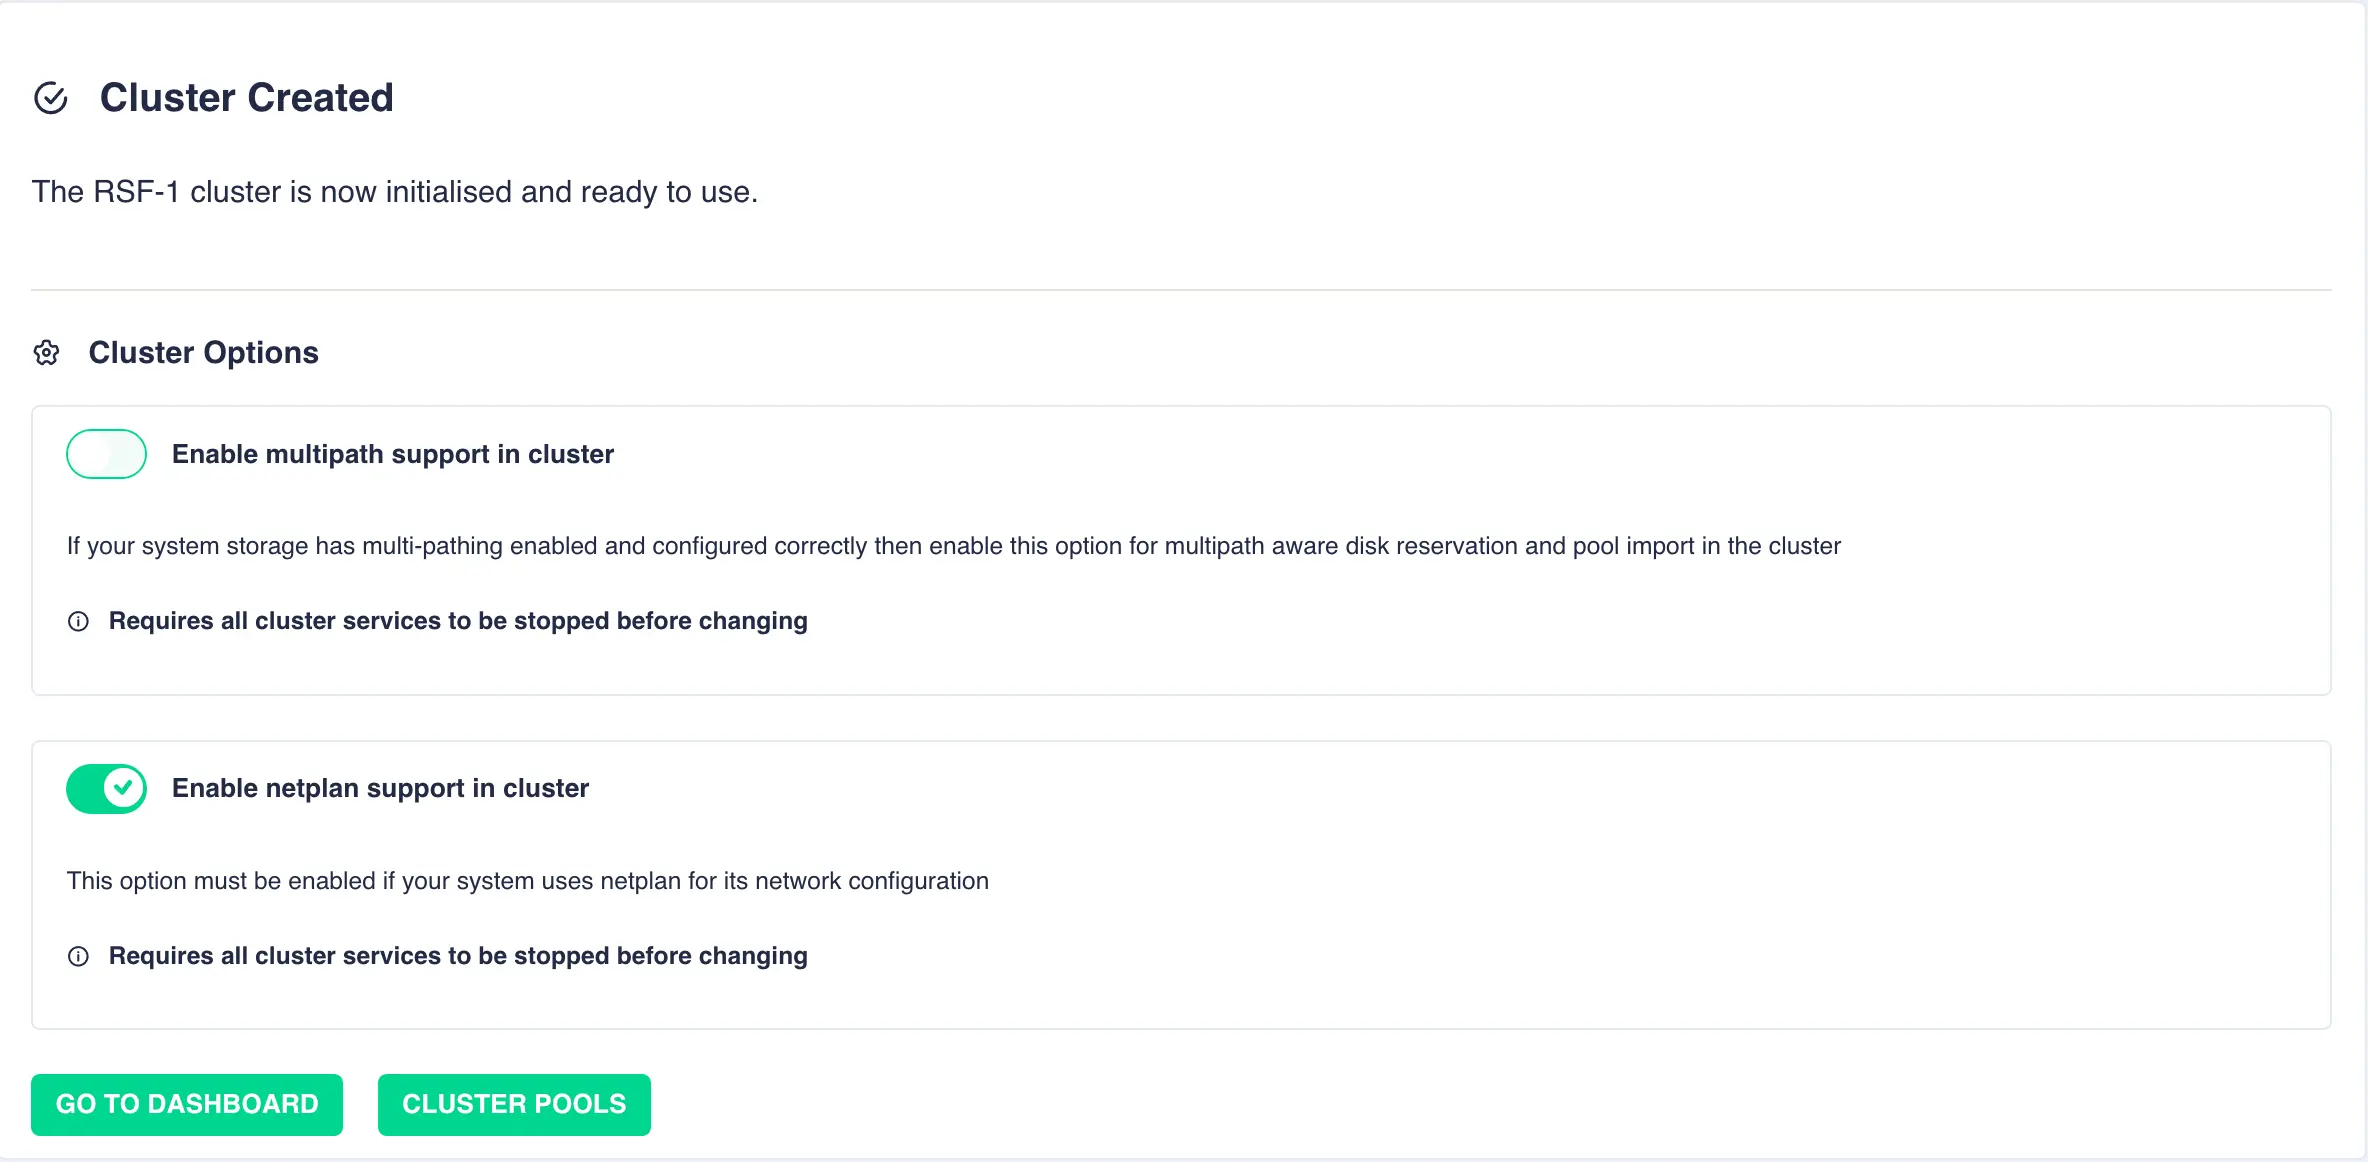
Linux Specific Options
For Linux, once the cluster has been created additional settings are provided:
-
For shared storage clusters if your drives have been configured for multipathing then enable MultiPath support.
Enabling Multipath Support
If the disks have been configured to use multipathing you must enable multipath support otherwise disk reservations will not function correctly. Do not enable if disks are configured for singlepath only.
-
For Ubuntu servers that are configured to use
netplan, enablenetplansupport. This ensures VIP addresses are added and removed using thenetplanservice.
These settings can be modified after cluster set-up if needed.
They can be found in Settings -> Linux.
Creating a Pool in the WebApp
Now the cluster is created the next step is to cluster a pool. This can either be an existing pool or one created using the webapp; if you already have pools configured skip ahead to the next section.
To create a pool, navigate to ZFS -> Pools and then click the + CREATE POOL:

Enter the desired Pool Name and select a Pool Mode (jbod, raidz2 or mirror).
Next add your drives to the pool by selecting them in the Available Disks list and choosing their
role using the buttons below the list:

To configure multiple mirrors in a pool, select the first set of
drives from the list and add them as data disks; then select your next
set of drives, click DATA, then from the popup menu select + New vdev (selecting
vdev-0 instead would extend that vdev rather than creating a new one):

This action will then add a further pair of mirrored drives to the pool layout, creating a mirrored stripe; additional drives are adding in the same manner.

Once configuration is complete, click SUBMIT and the pool will be created and ready
for clustering. The configuration of the pool can be checked by clicking the
expand/collapse arrow on the left hand side of the pool stripe:

Preparing Pools to Cluster
Pools must be imported on one of the nodes before they can be
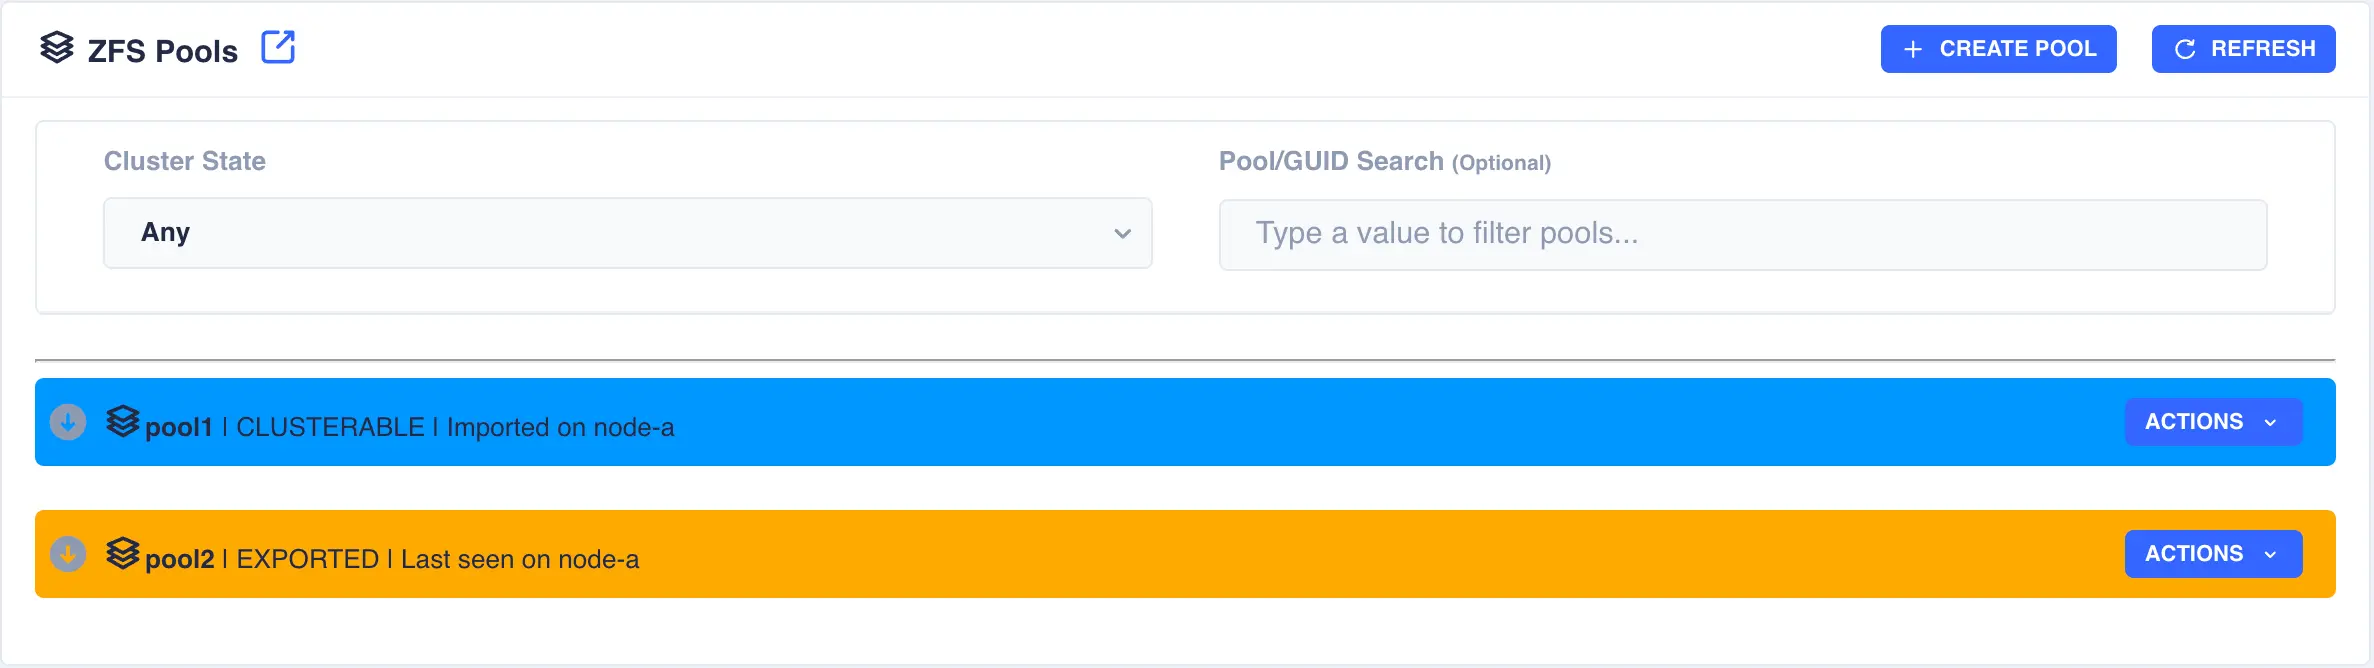
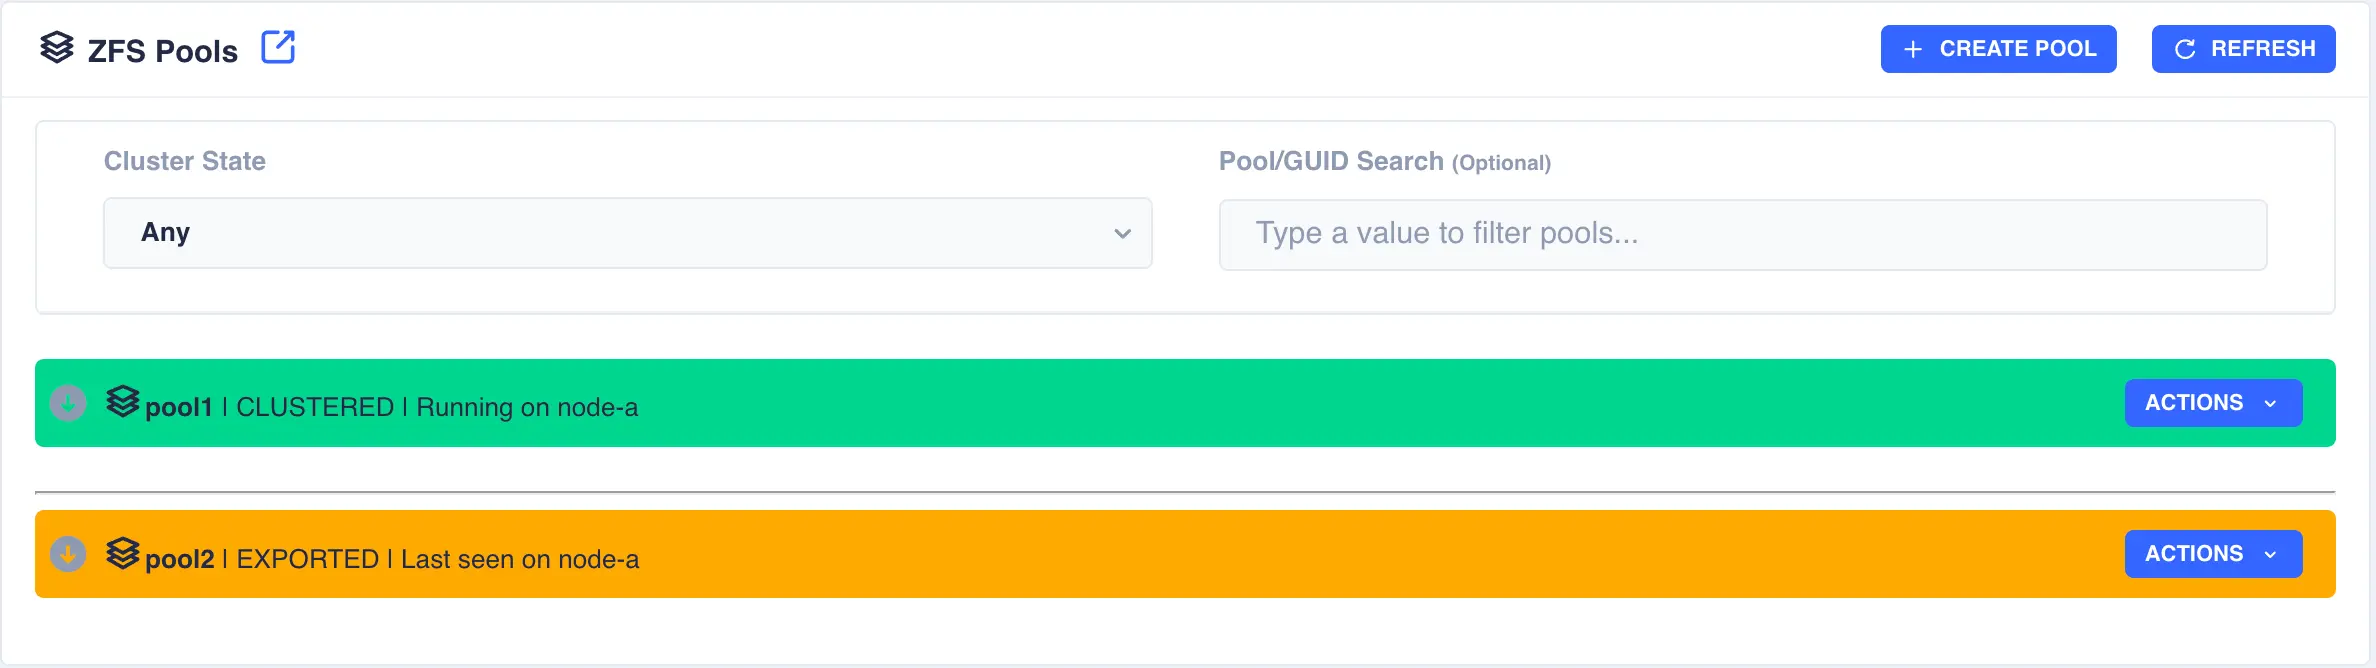
clustered. Check pool import/export status by navigating to ZFS -> Pools from the
side menu:
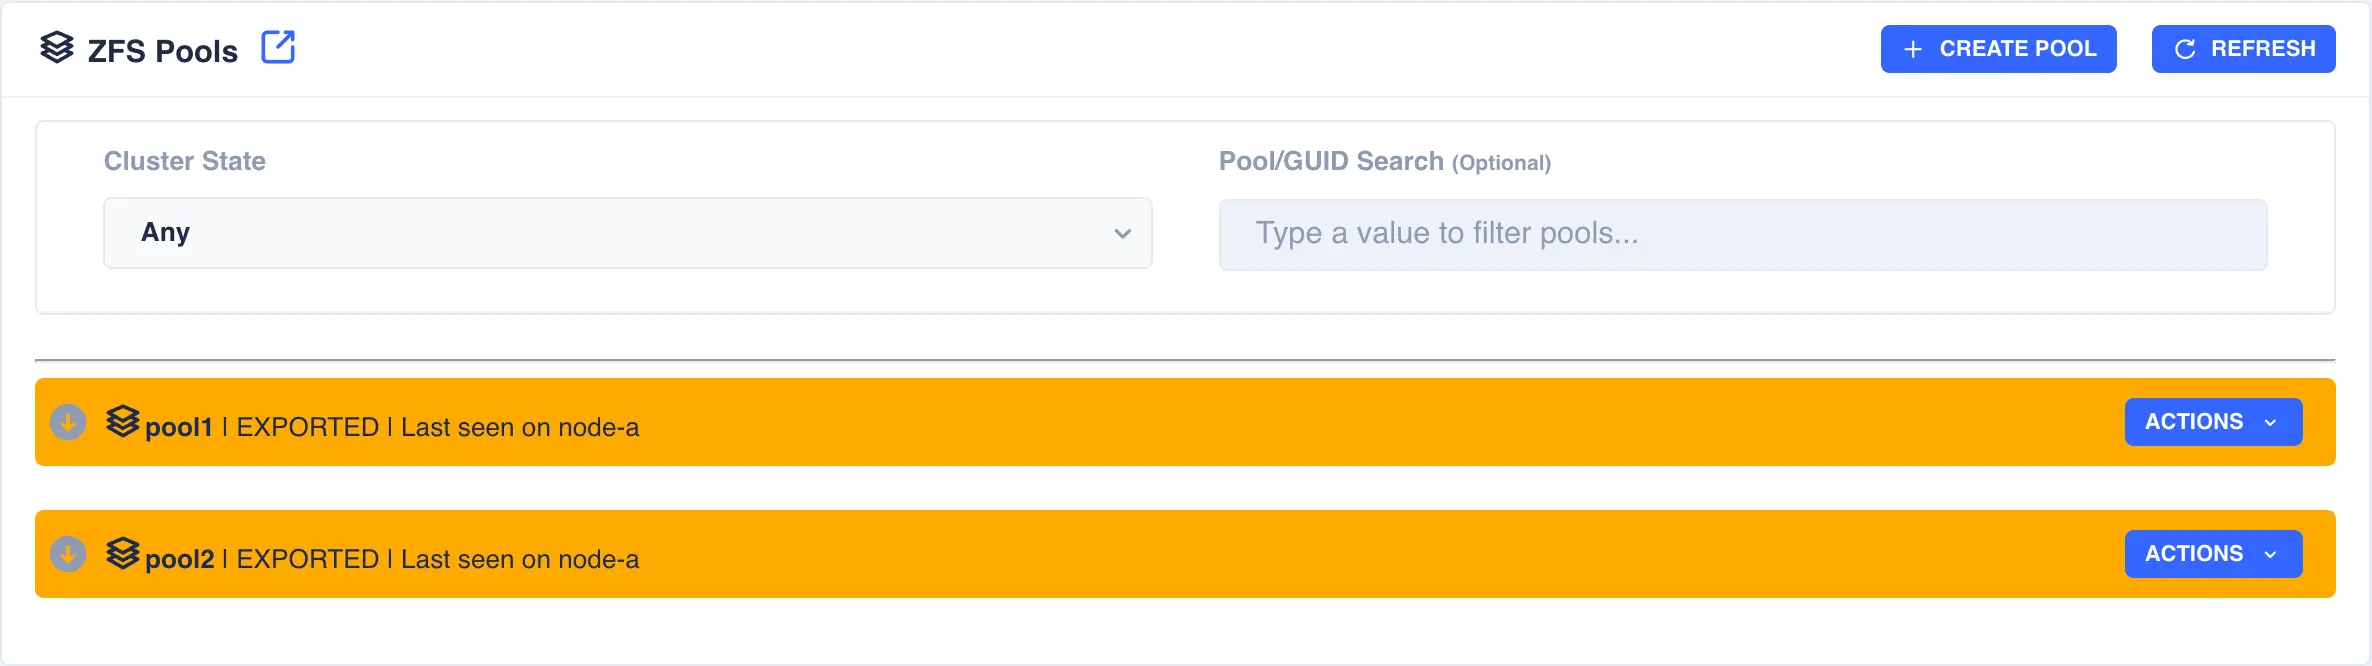
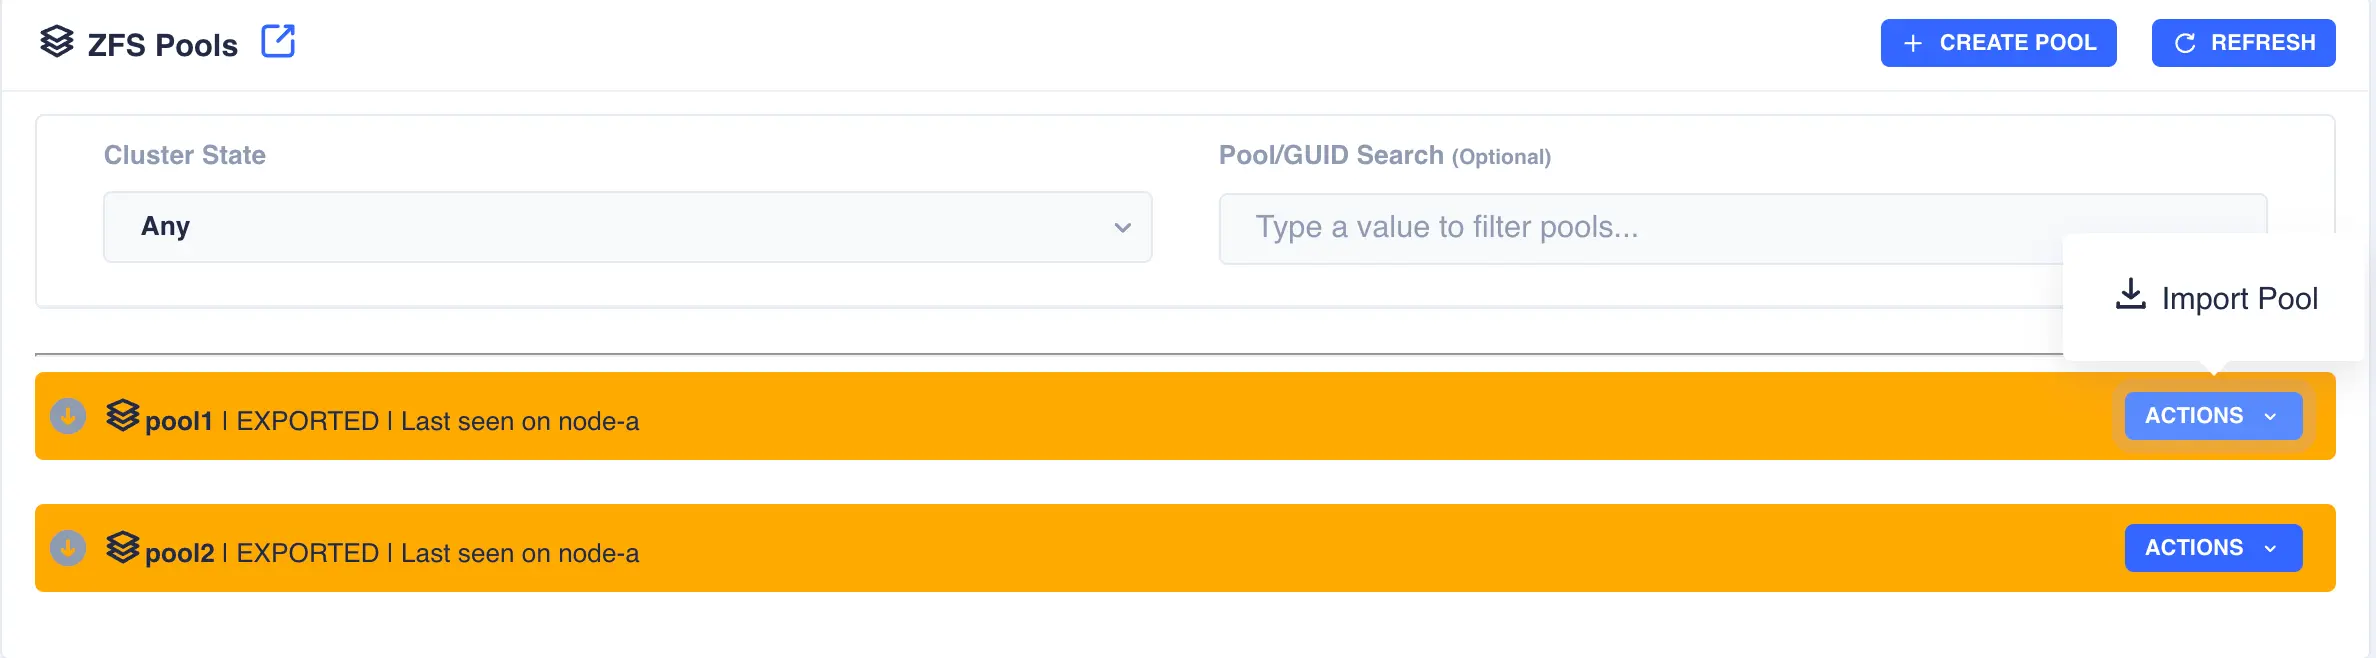
In the above example pool1 and pool2 are both exported. To import pool1, open the pools ACTIONS
menu and select Import Pool (in a shared nothing cluster both pools will be imported on their
respective nodes simultaneously):
The status of the pool should change to Imported and CLUSTERABLE indicating the pool is now ready for clustering:
Unclusterable Pools
Should any issues be encountered when importing the pool it will
be marked as UNCLUSTERABLE. Check the RestAPI log
(/opt/HAC/RSF-1/log/rest-operations.log) for details on why the
import failed.
With a shared-nothingcluster, this may happen if
the pools aren't imported on both nodes.
Clustering a Pool
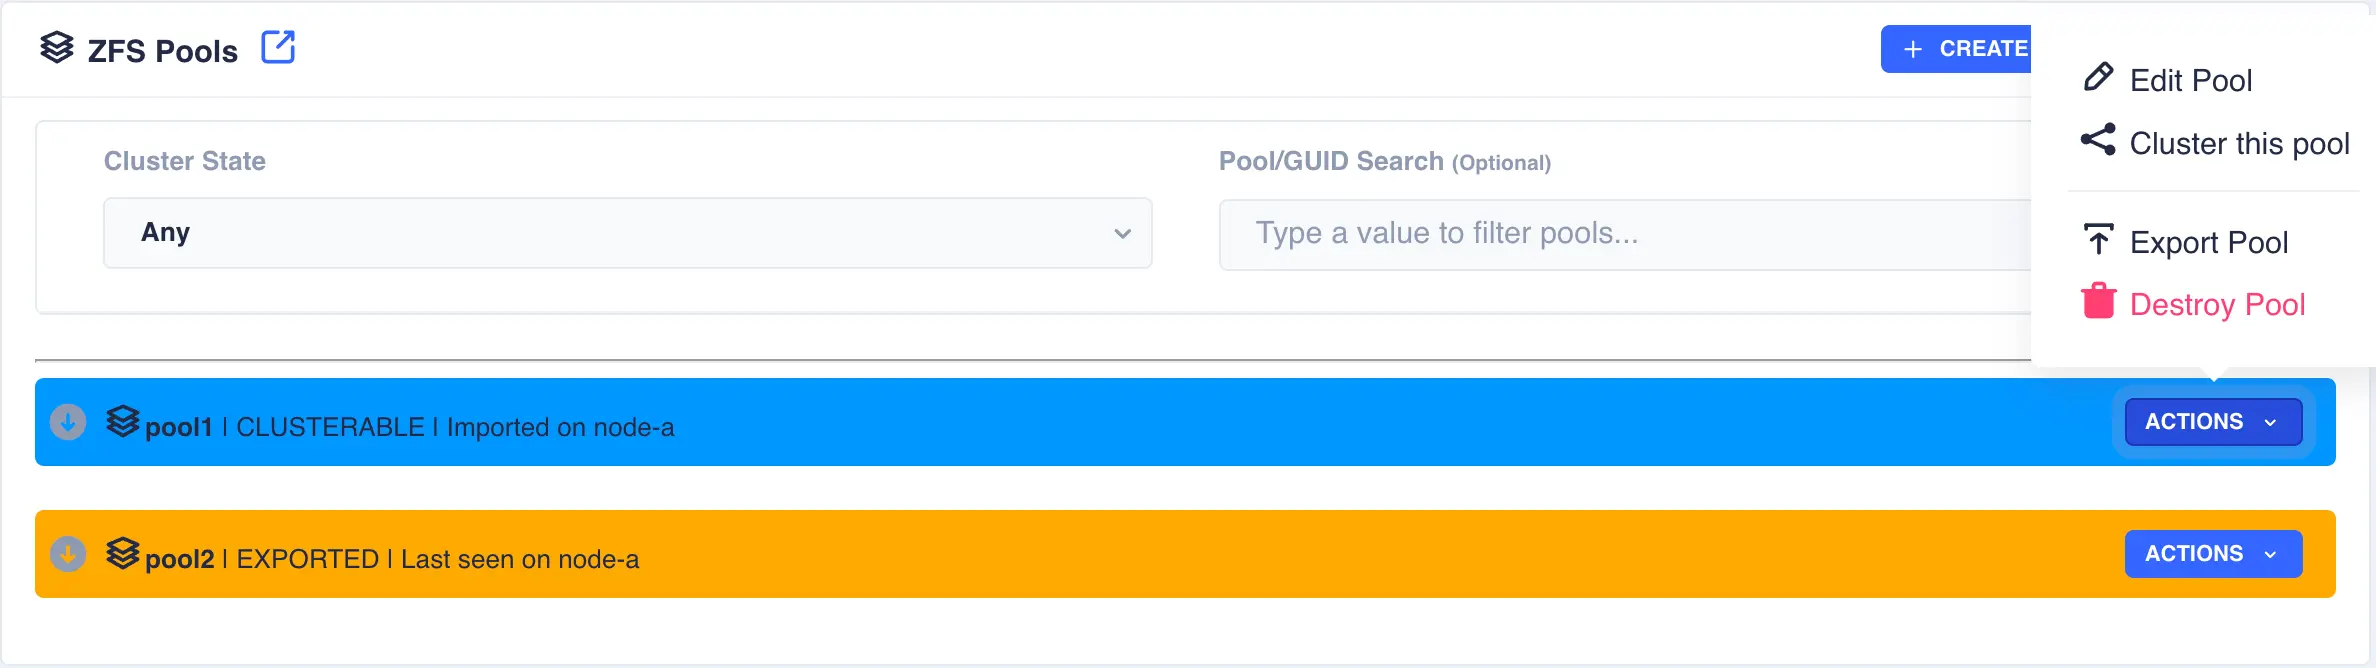
Highlight the desired pool
to be clustered (choose only pools marked CLUSTERABLE ), then select Actions
followed by Cluster this pool:
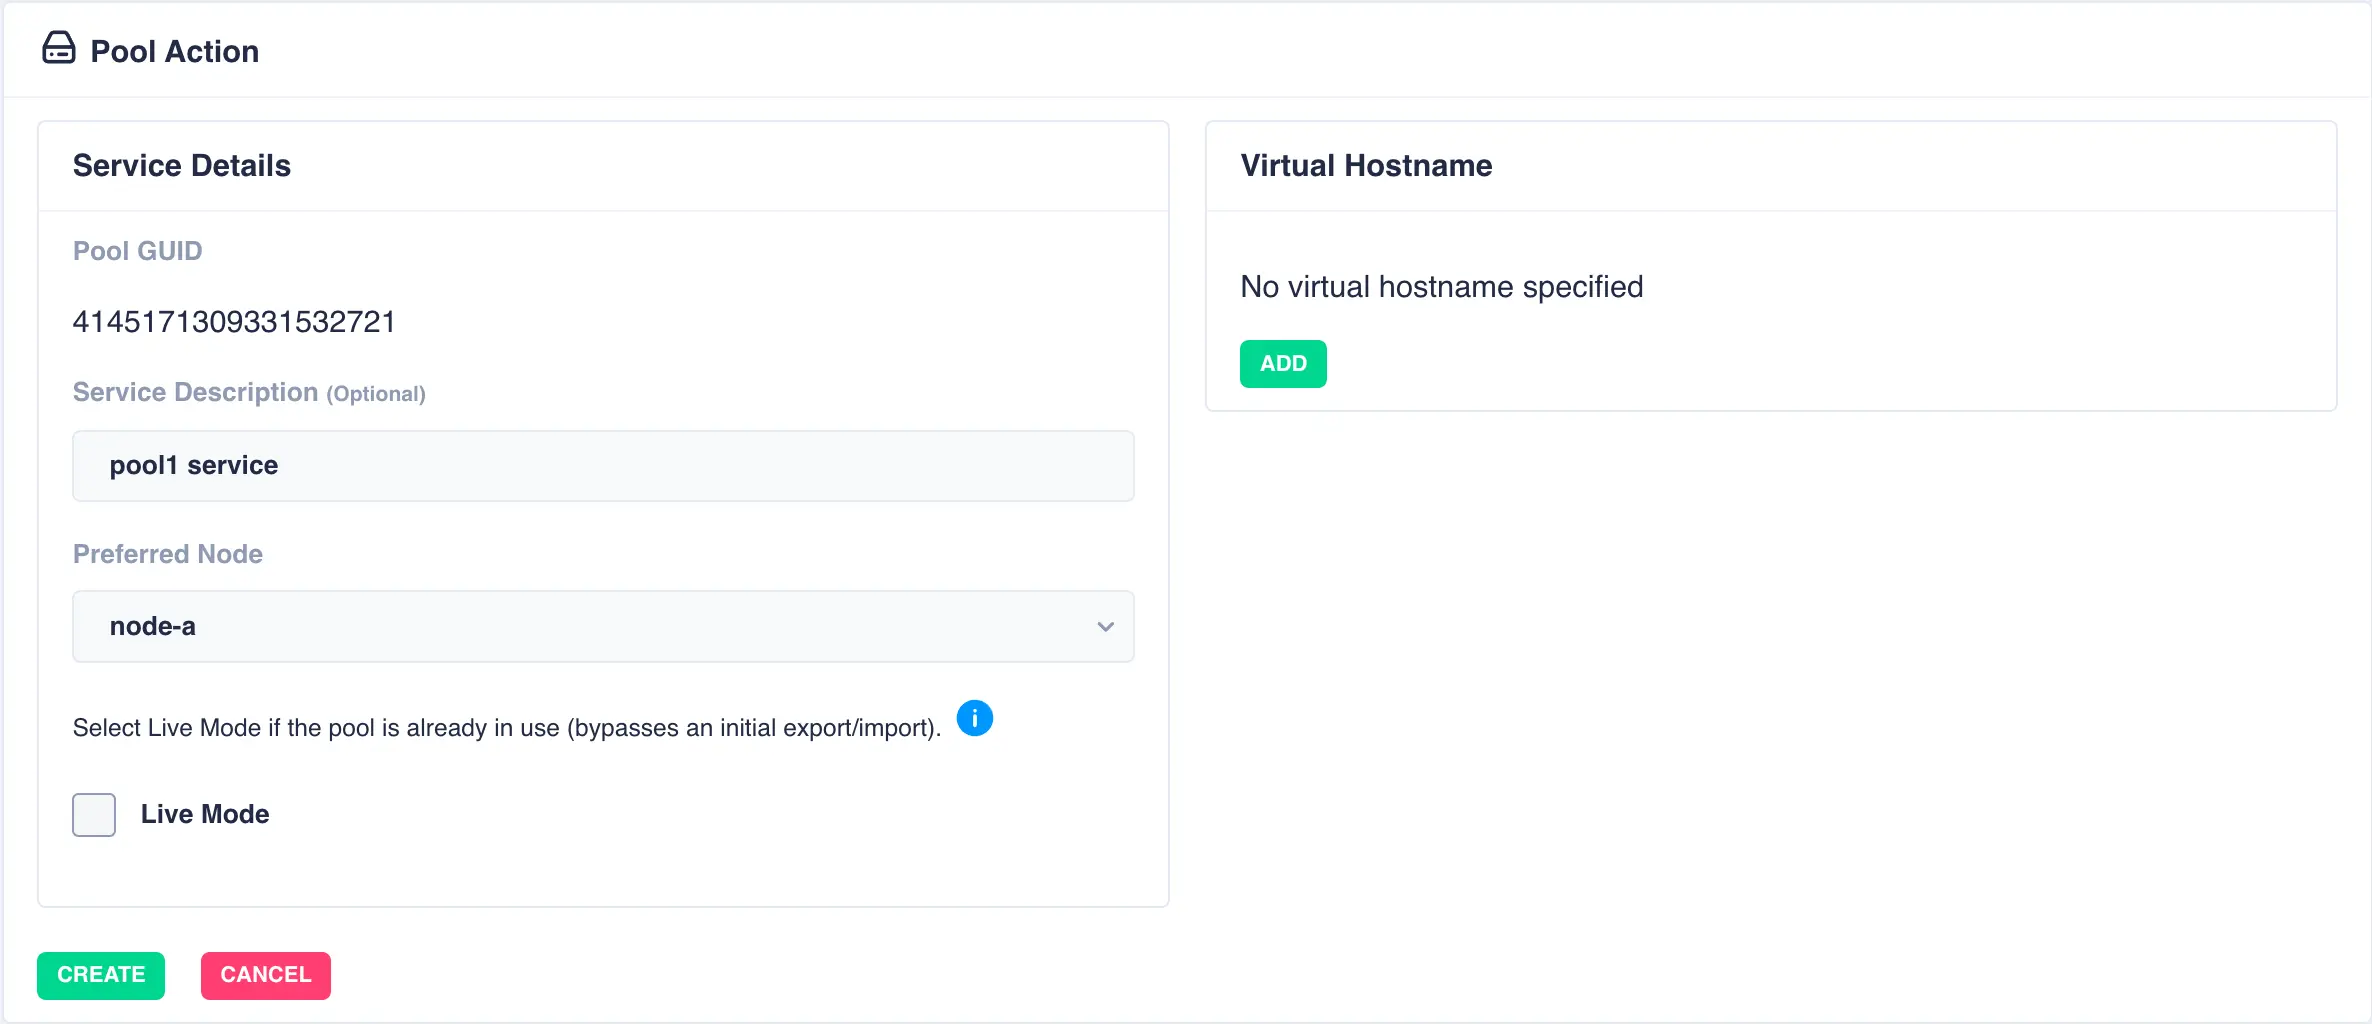
Fill out the description and select the preferred node for the service:
What is a preferred node
When a service is started, RSF-1 will initially attempt to run it on it's preferred node. Should that node be unavailable (node is down, service is in manual etc) then the service will be started on the next available node.
For shared nothing clusters the system will synchronise data from the preferred node to remote node(s), with any data on the destination pools being overwritten. If clustering a pool with existing data, set the preferred node to be the node where the pool with existing data is imported to prevent its data being overwritten.
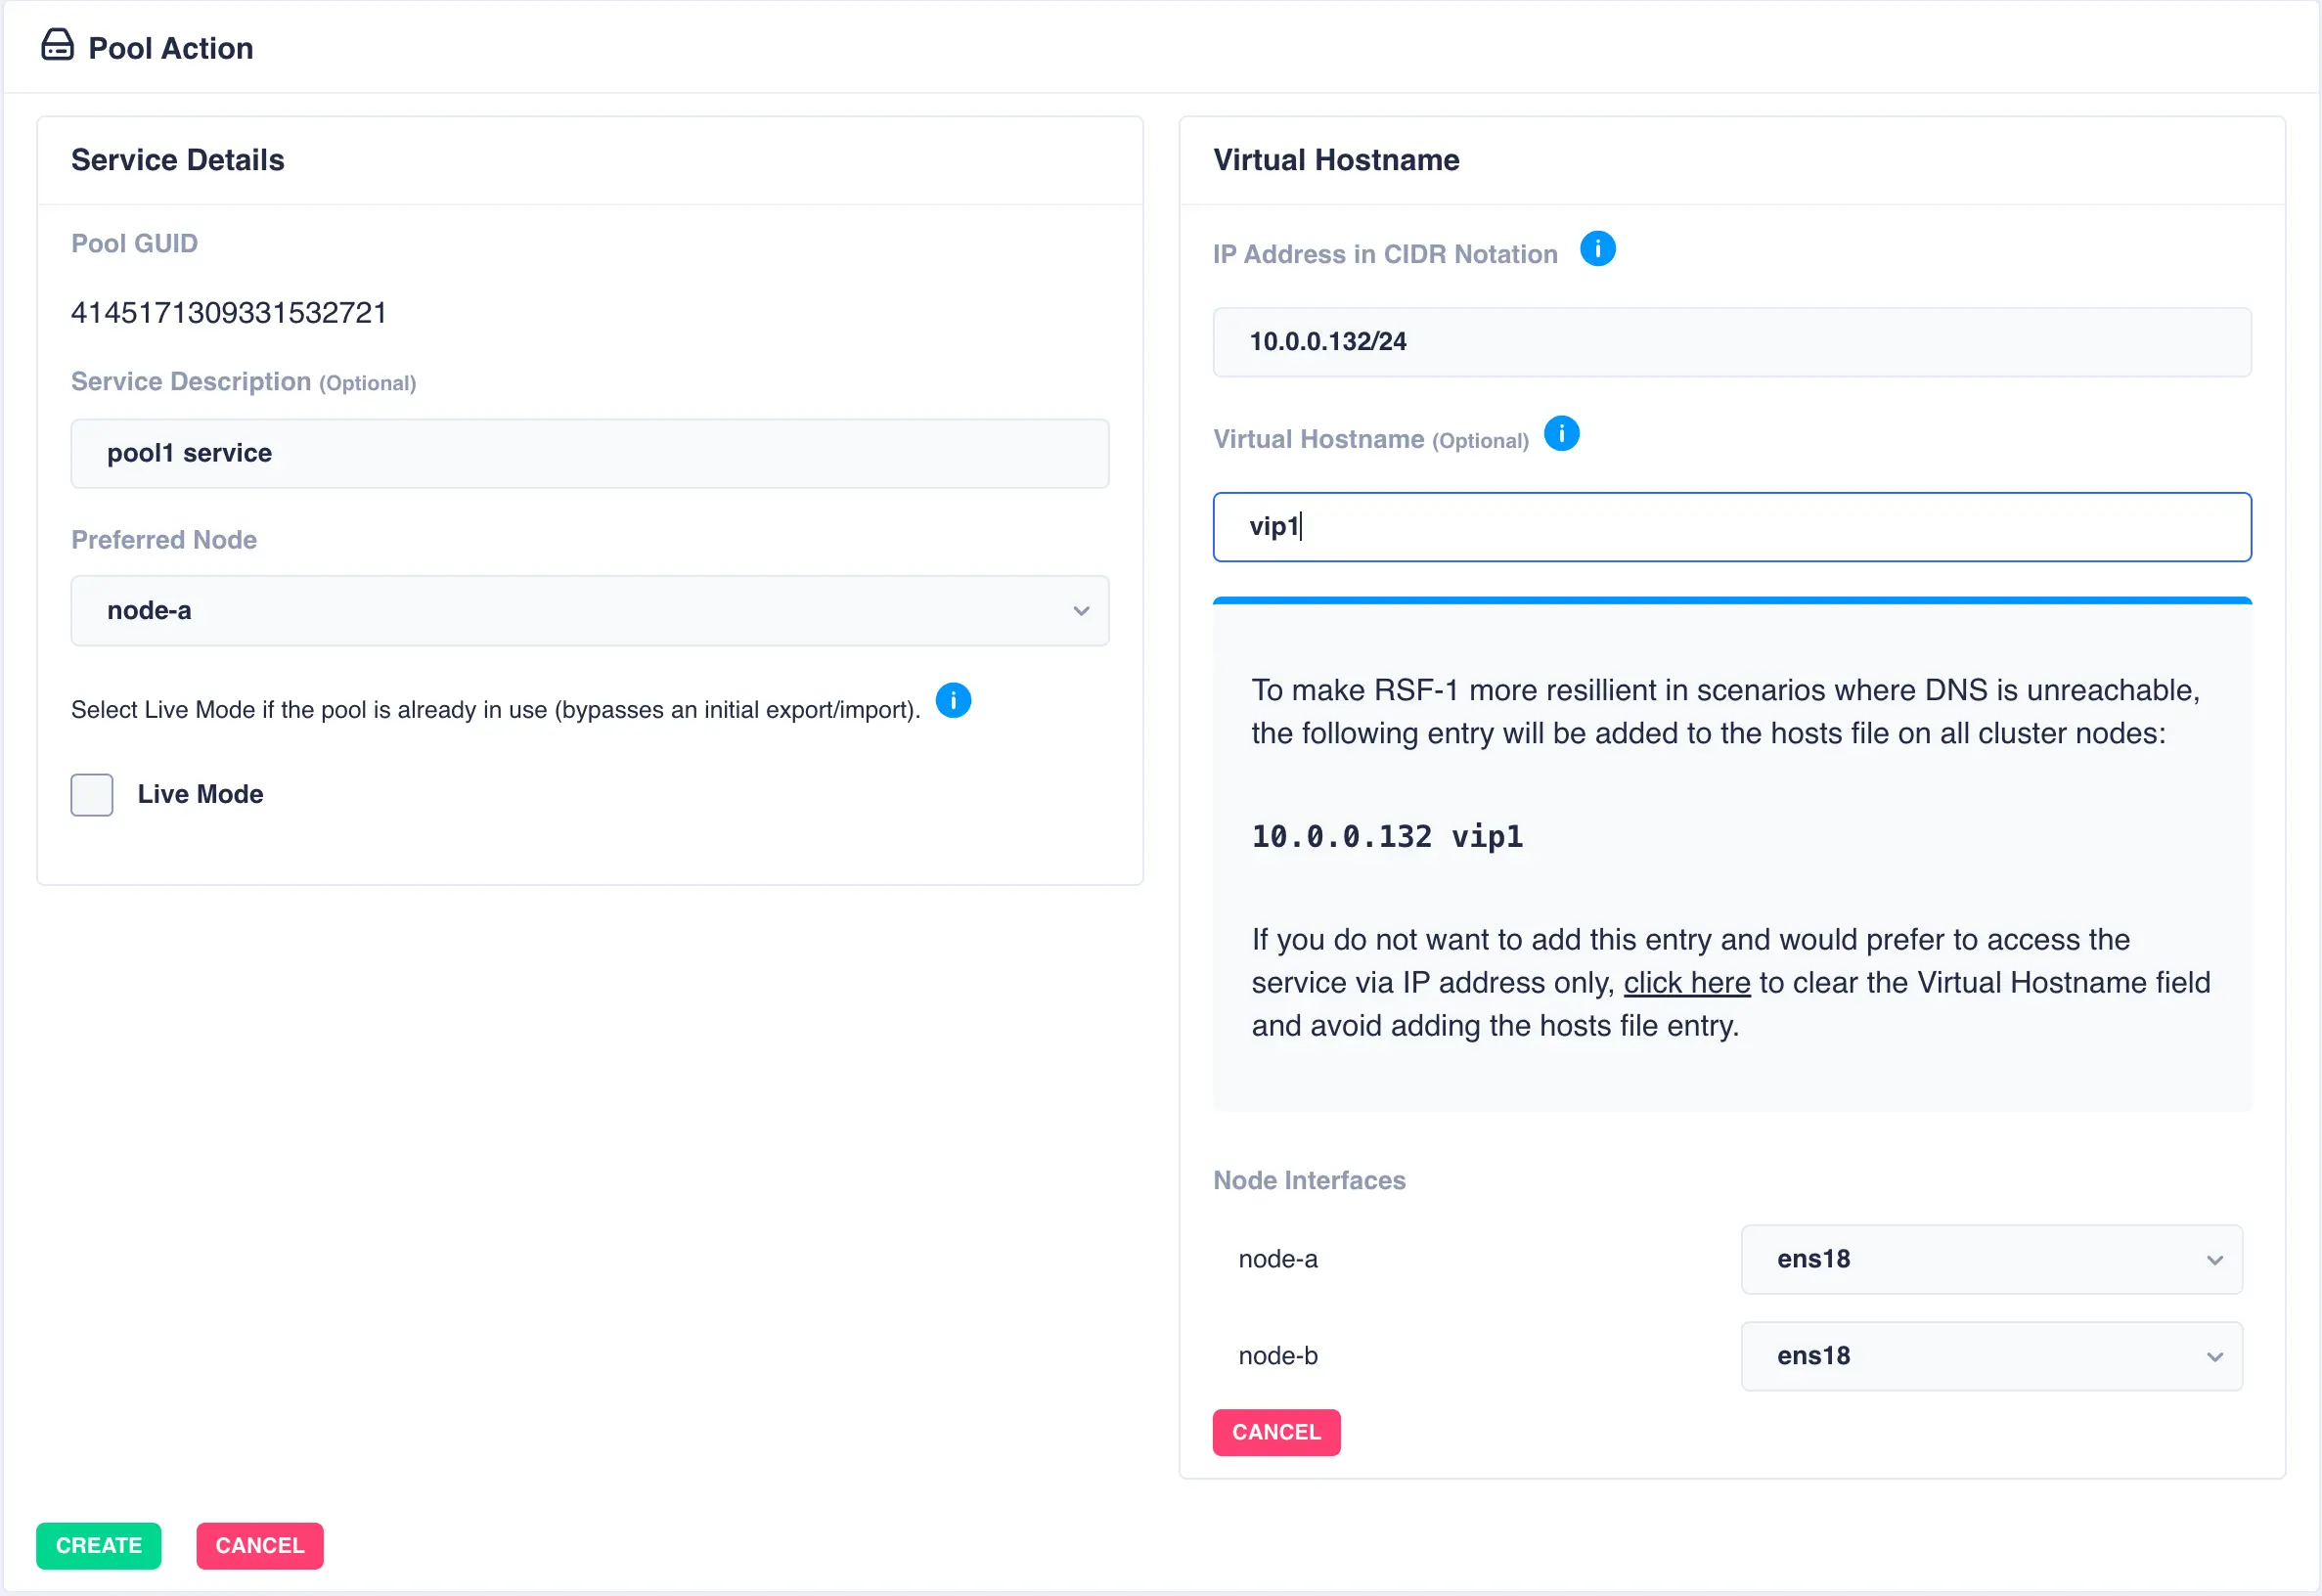
With a shared-nothing pool the GUID's for each pool will be shown:

To add a virtual hostname to the service click Add in the Virtual
Hostname panel. Enter the IP address, and optionally a hostname.
For nodes with multiple network interfaces, use the drop down
lists to select which interface the virtual hostname should be assigned
to.
Finally, click the Create button:
The pool will now show as CLUSTERED:
View Cluster Status
To view the cluster status, click on the Dashboard option on the side-menu:
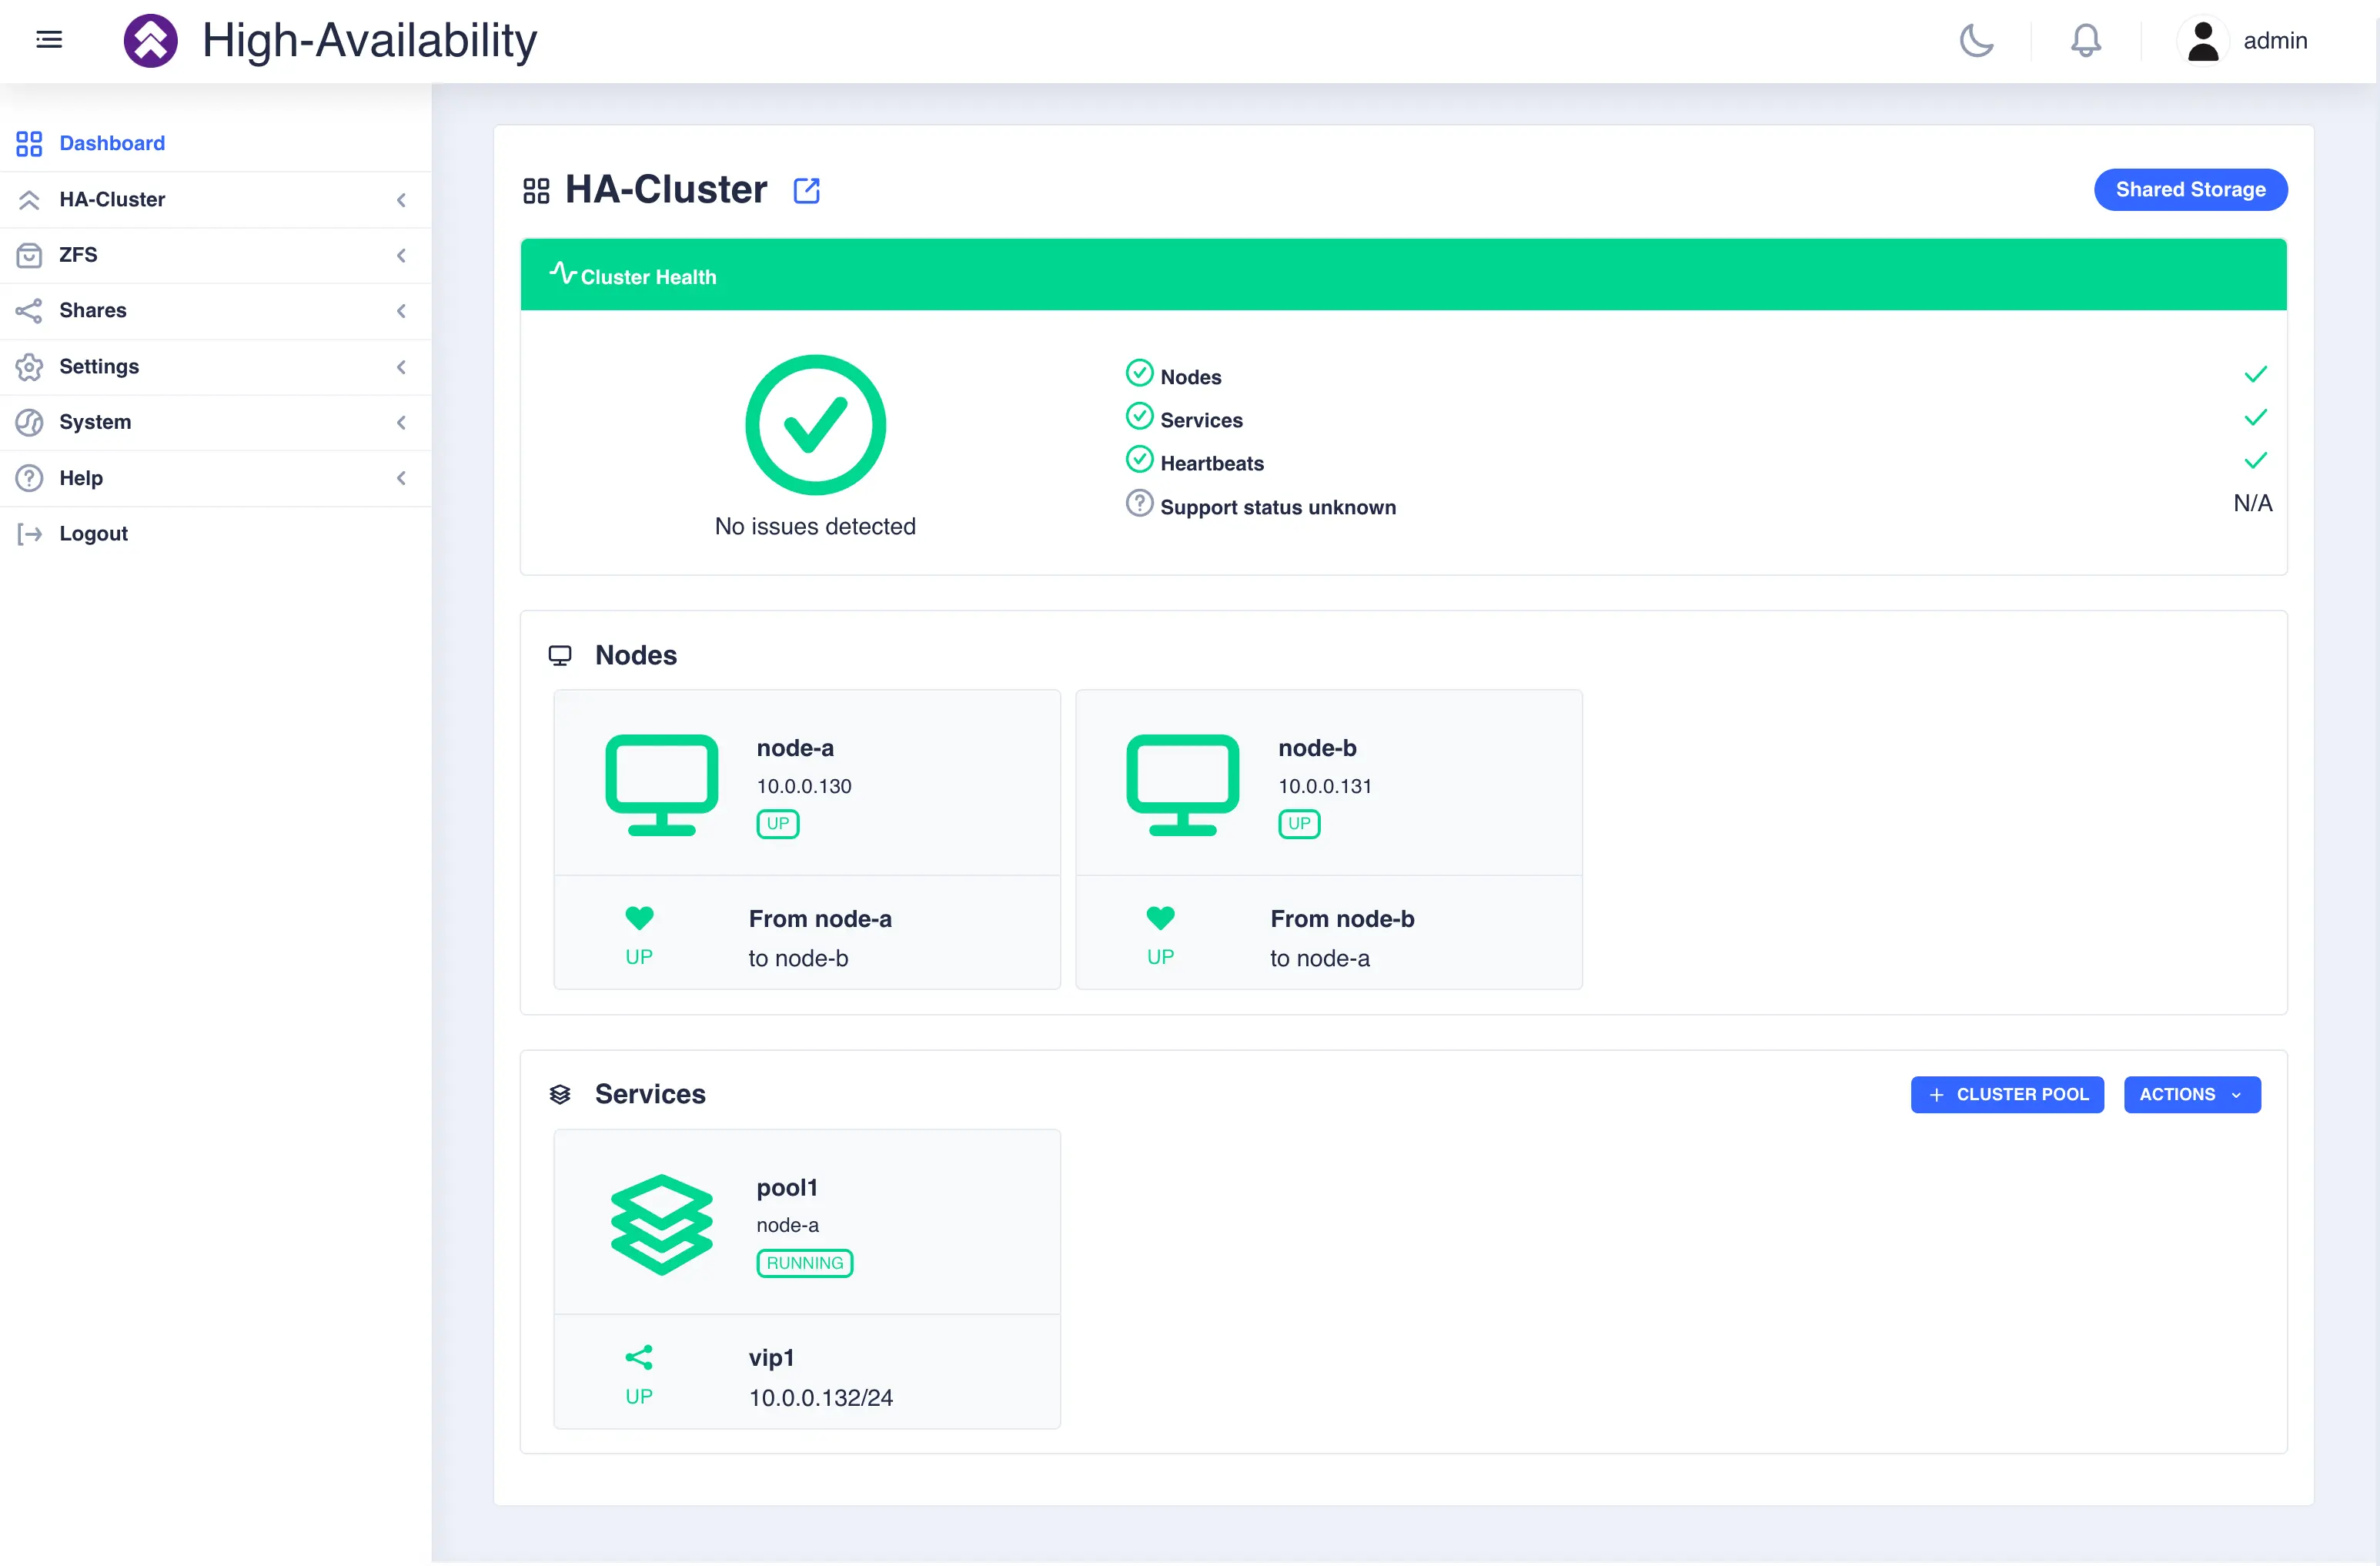
The dashboard shows the location of each service and the respective pool
states and failover modes (manual or automatic). The dashboard also allows
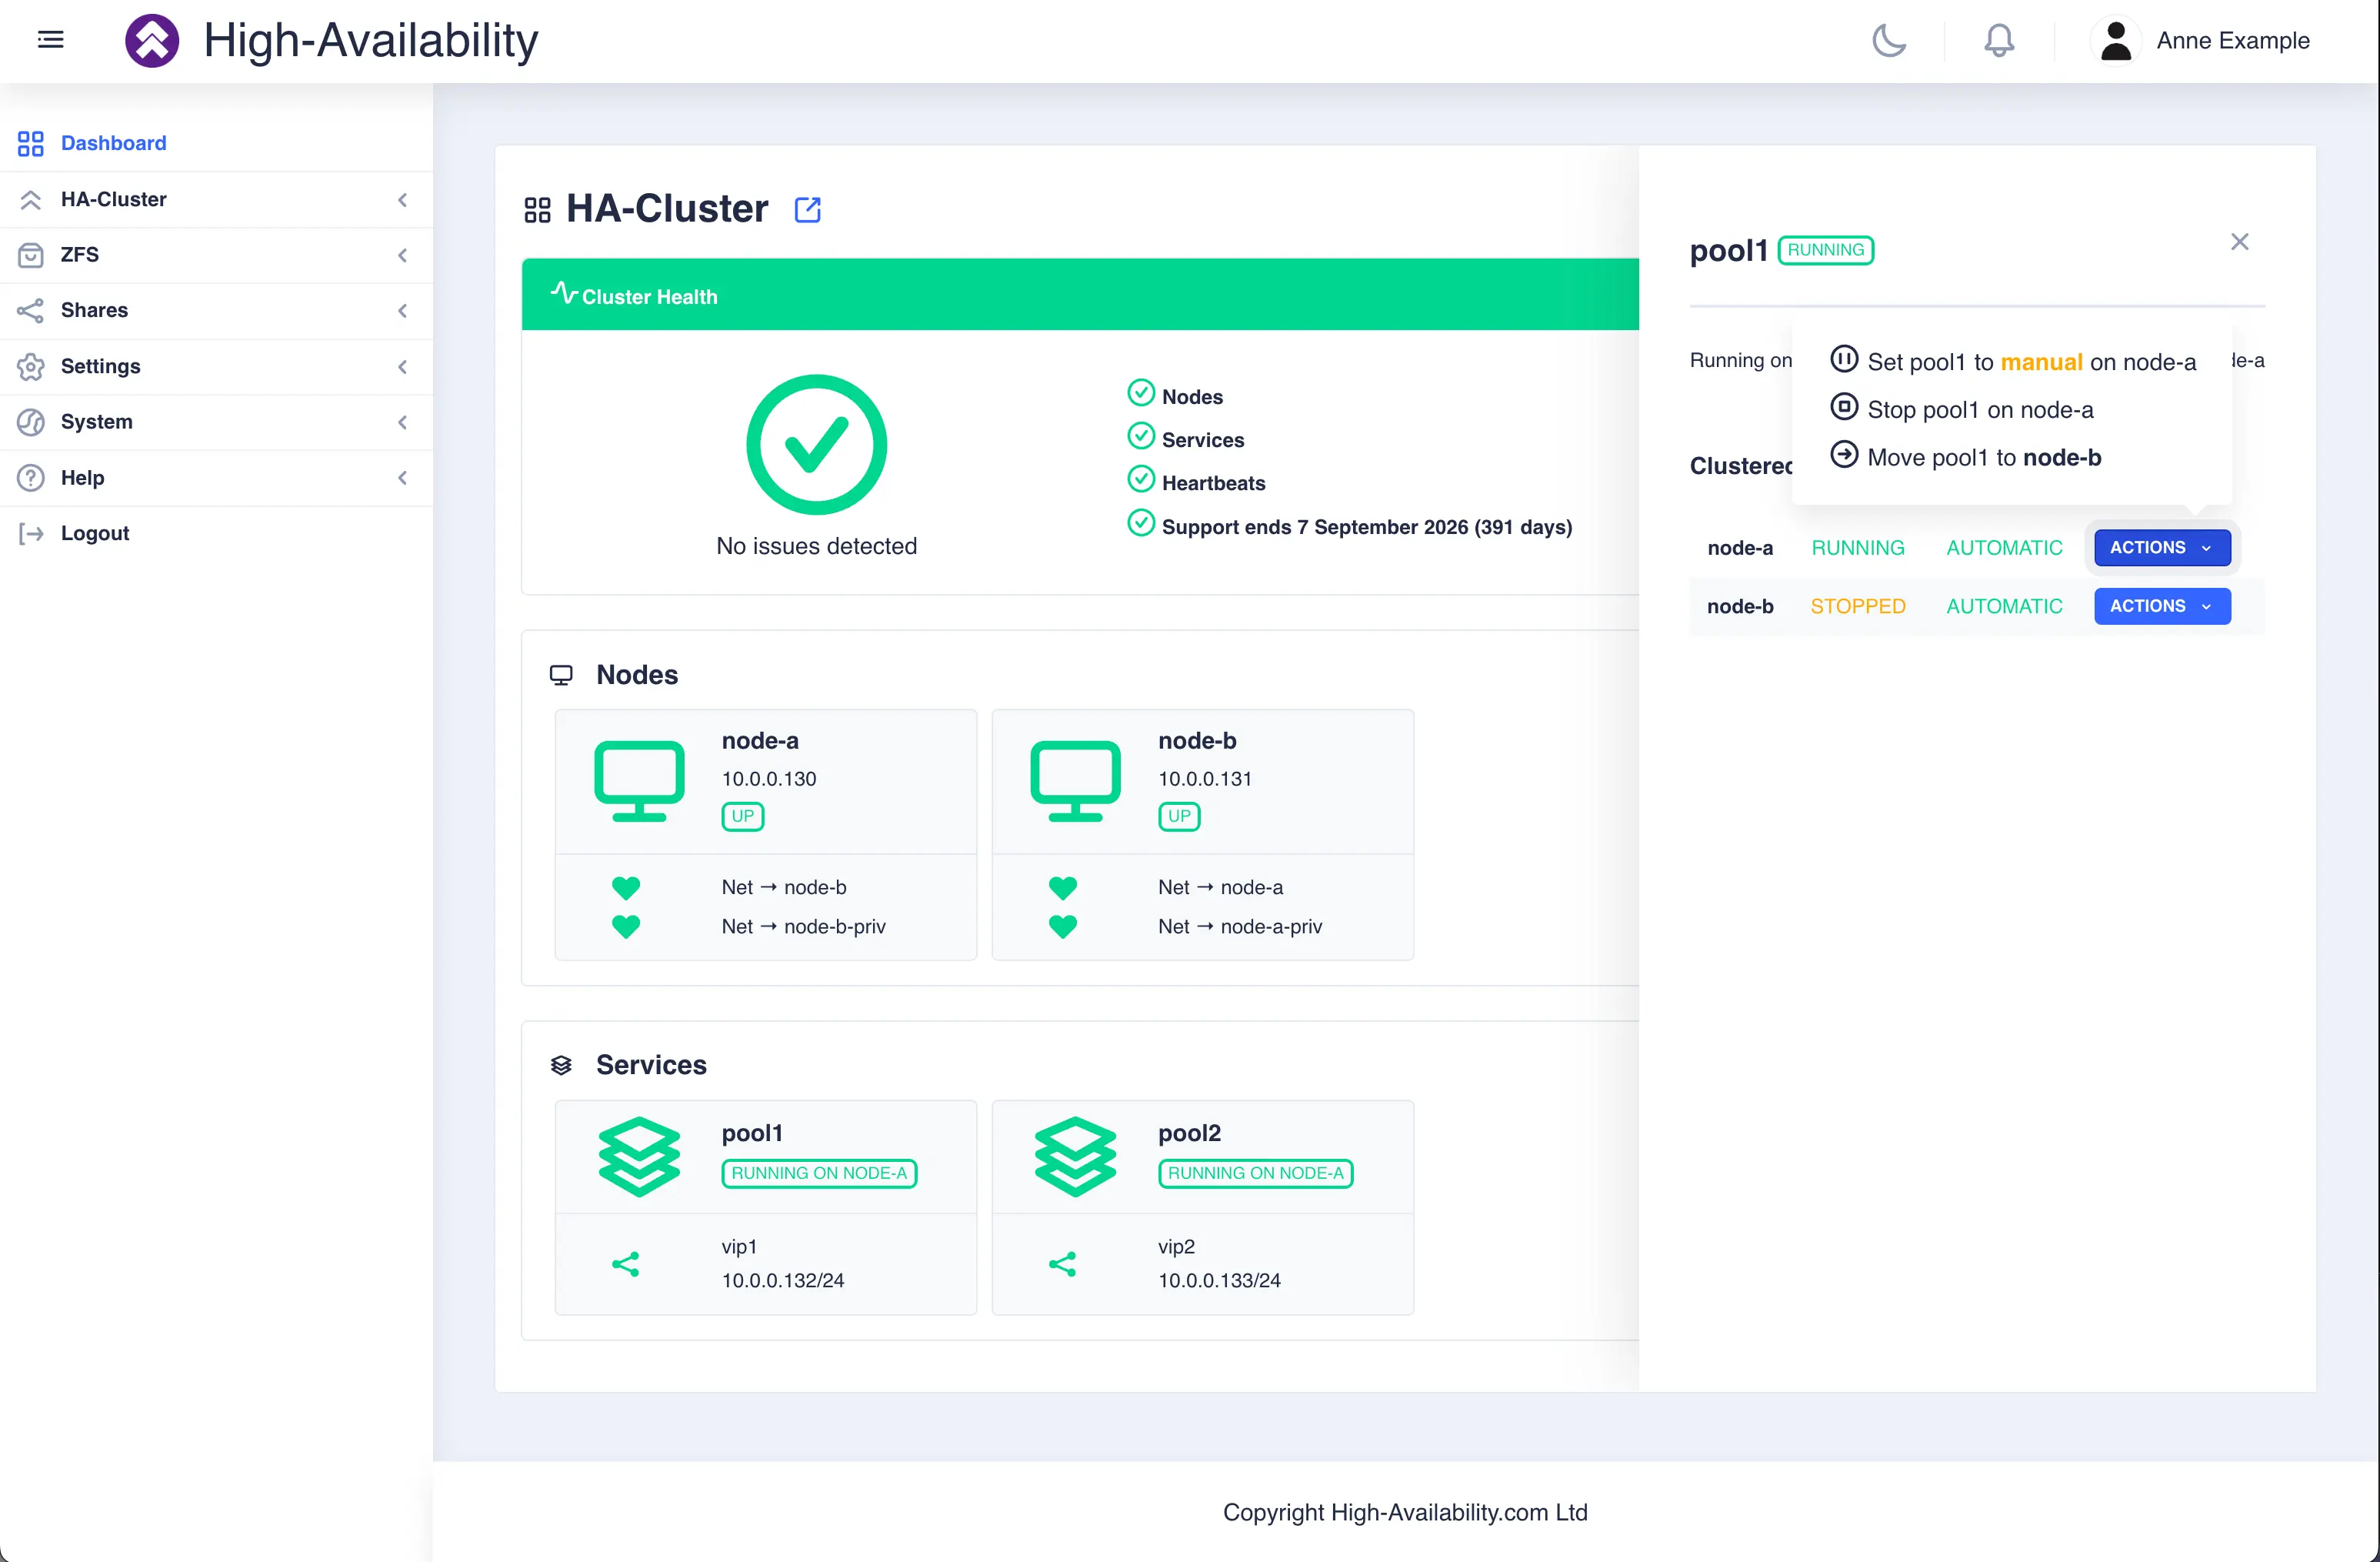
the operator to stop, start and move services in the cluster.
Select a pool then click the ACTIONS button on the right
hand side to see the available options:
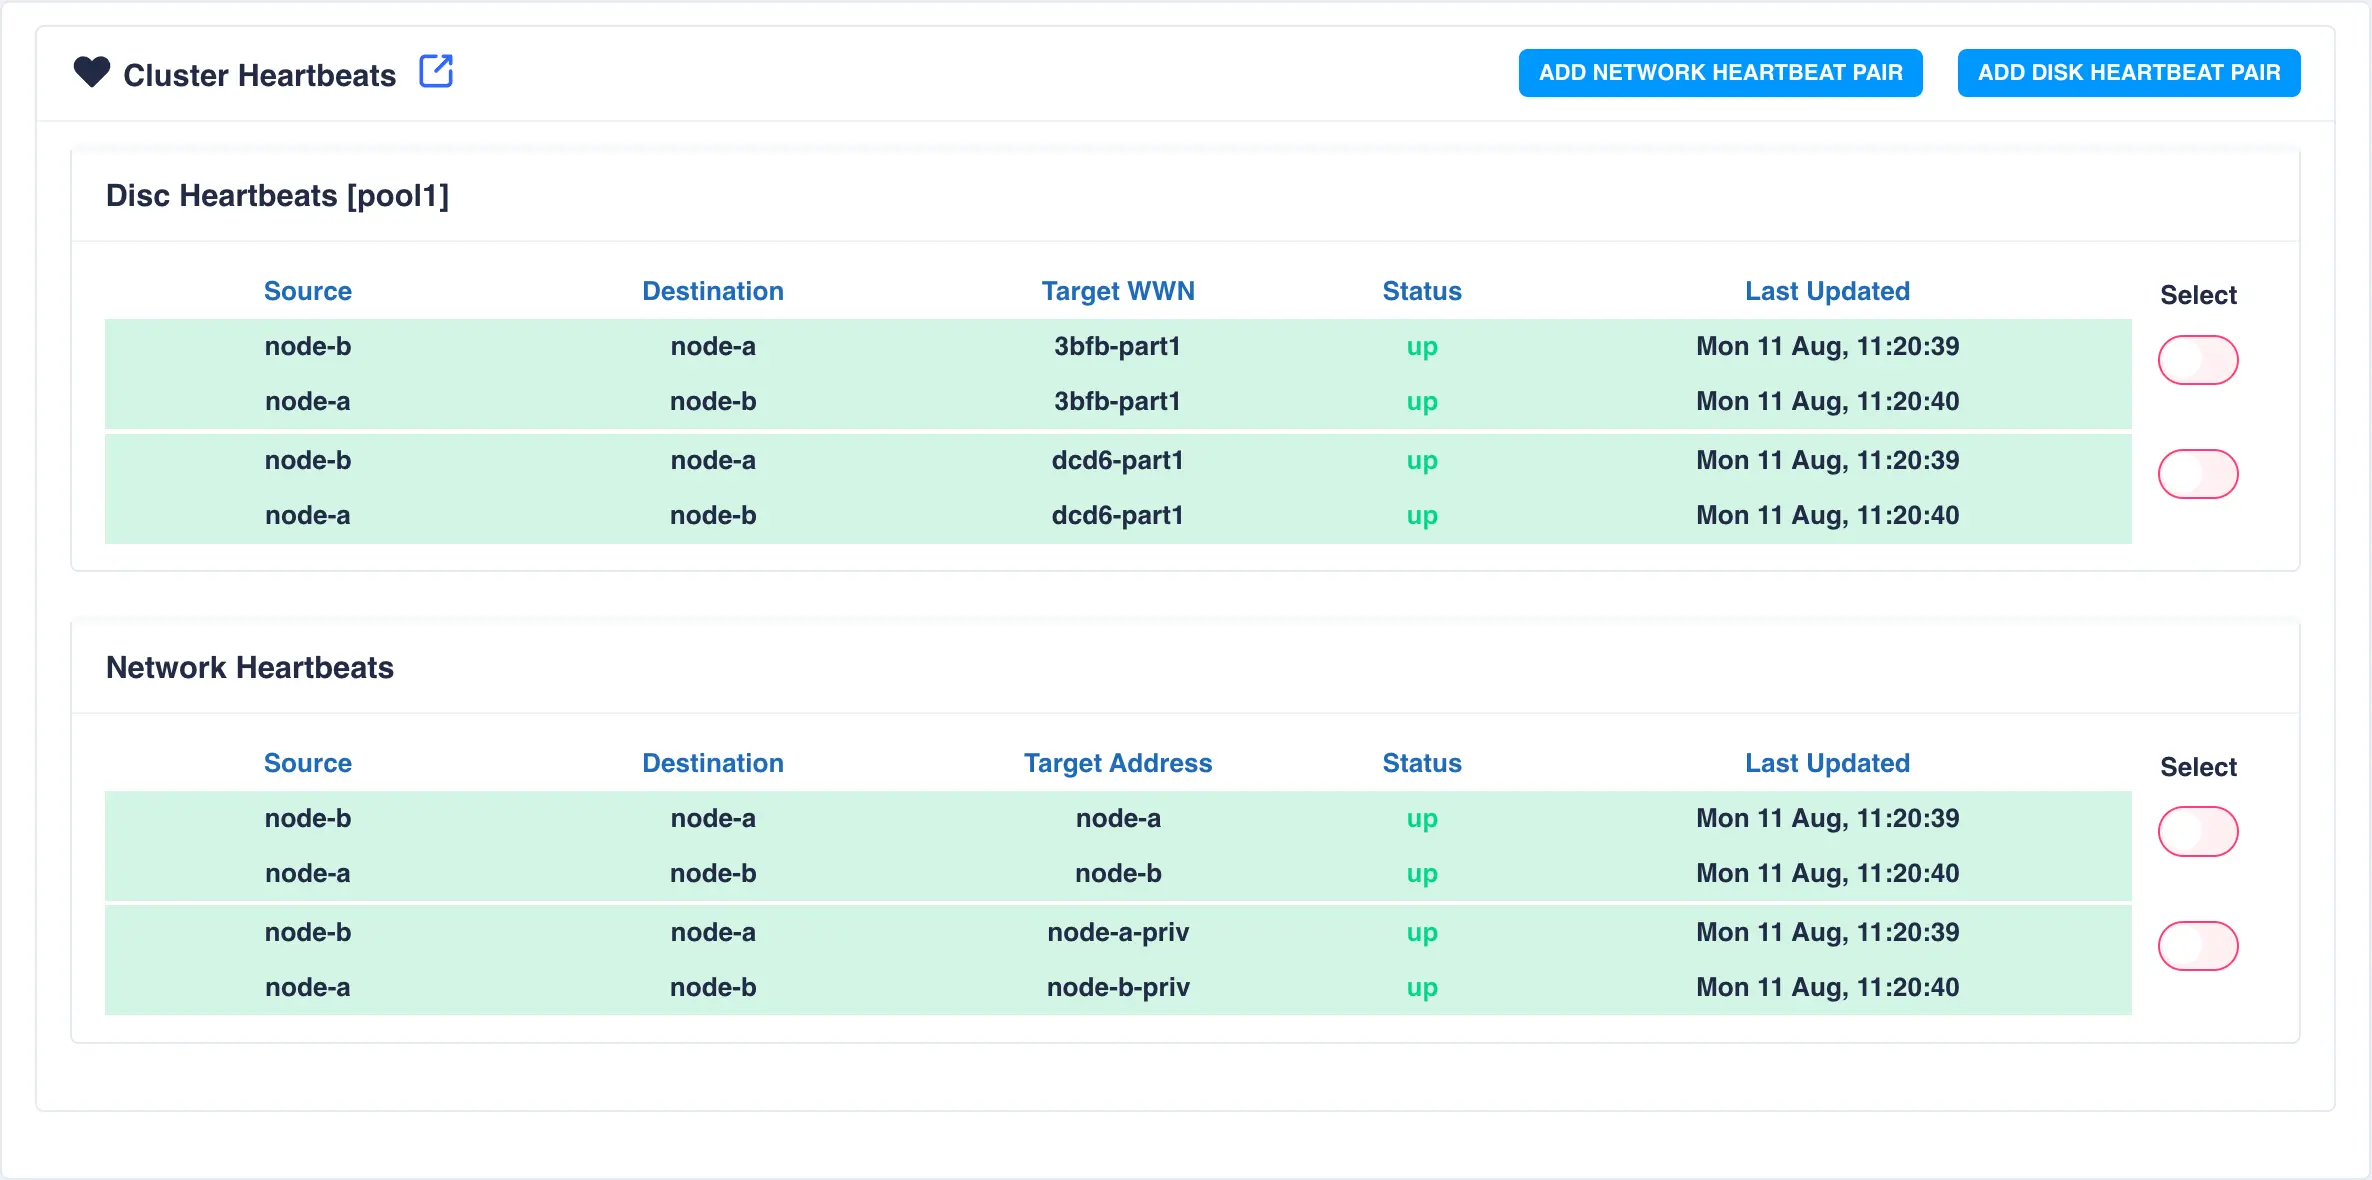
Cluster Heartbeats
To view cluster heartbeat information navigate to HA-Cluster -> Heartbeats on the side-menu:
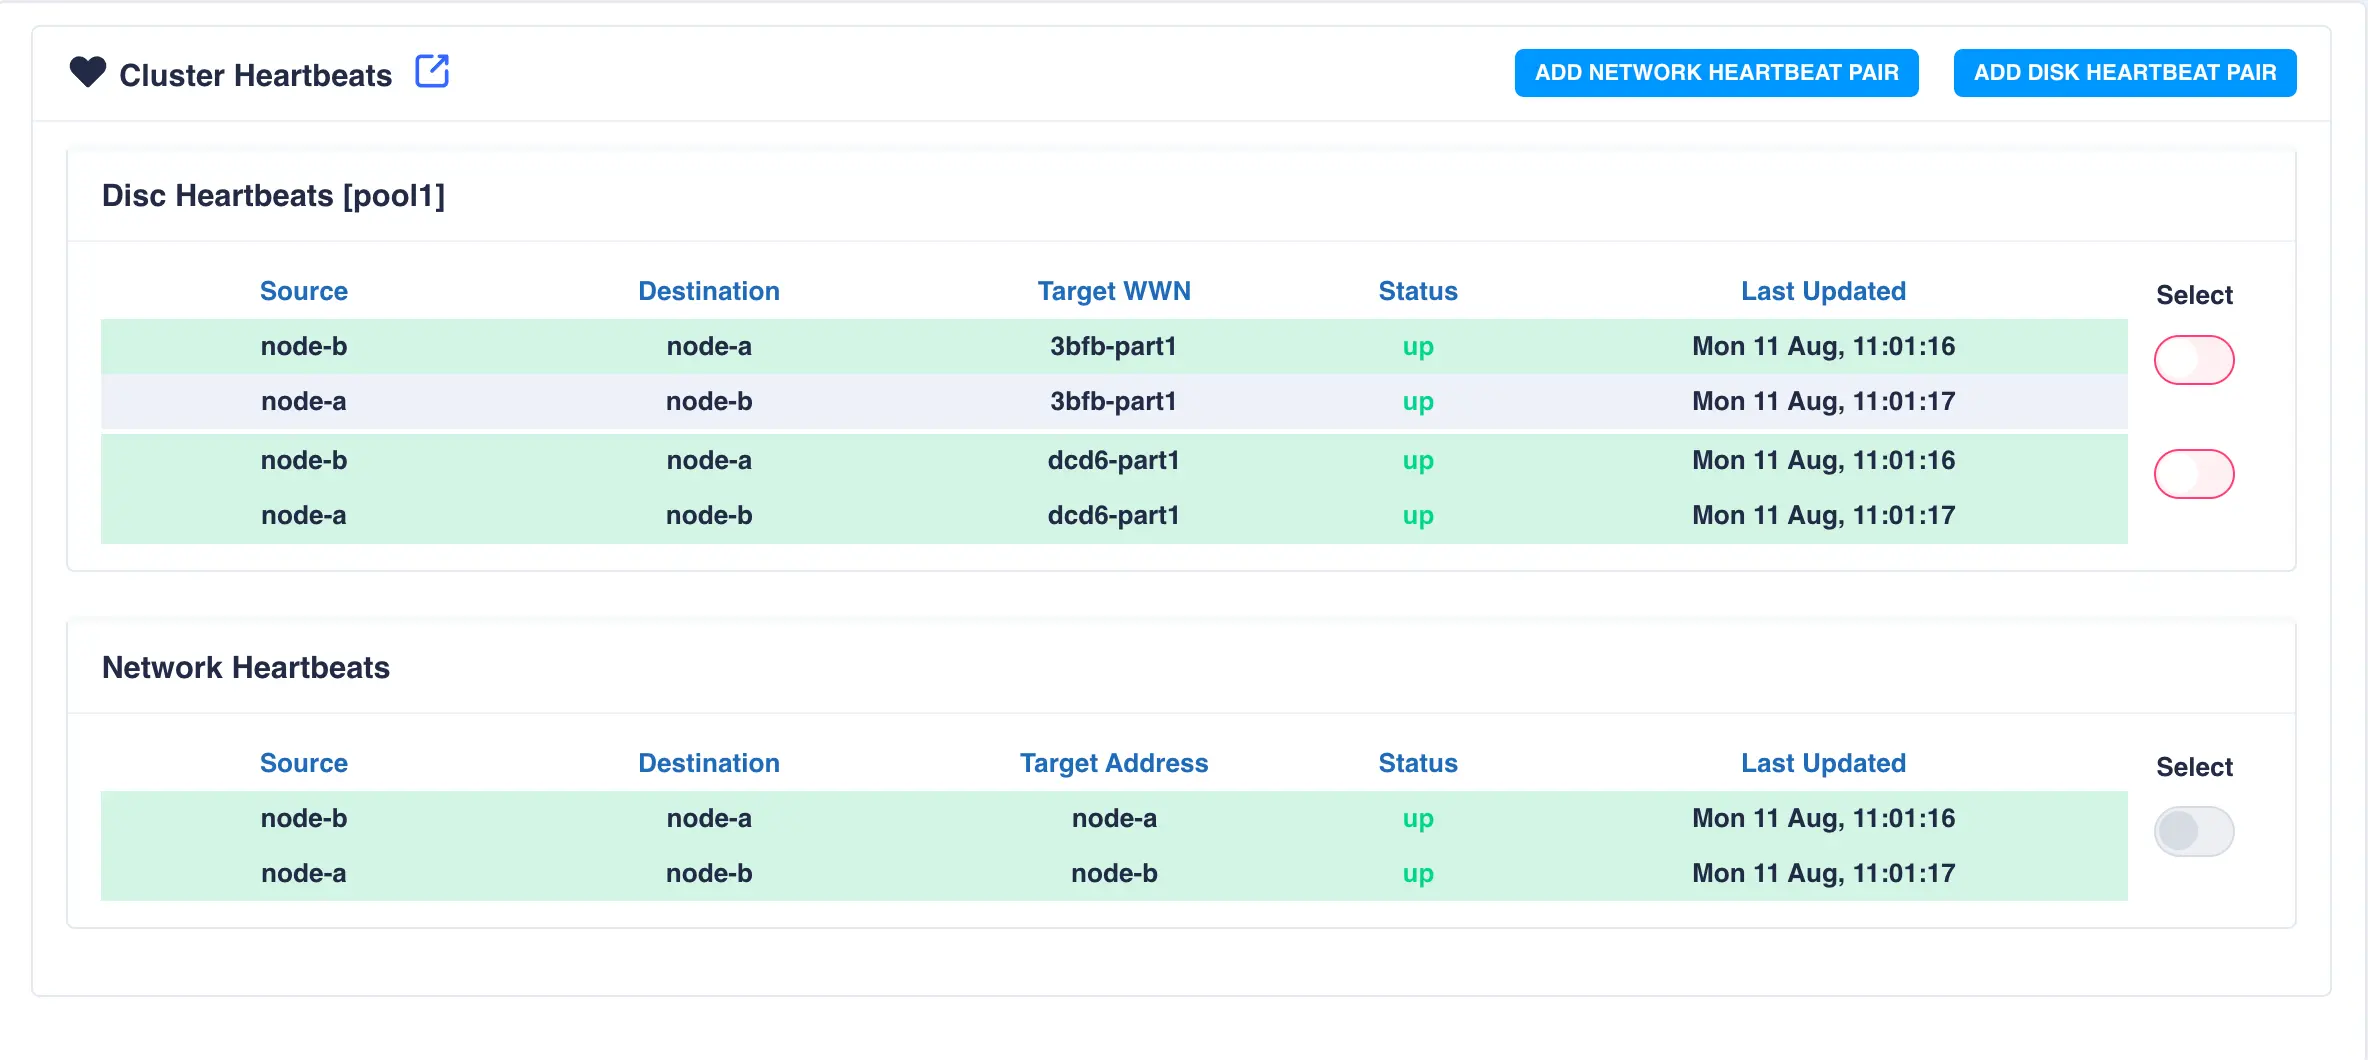
To add an additional network heartbeat to the cluster, select ADD NETWORK HEARTBEAT PAIR.
In this example an additional connection exists between the two nodes with the
hostnames node-a-priv and node-b-priv respectively. These
hostnames are then used when configuring the additional heartbeat:
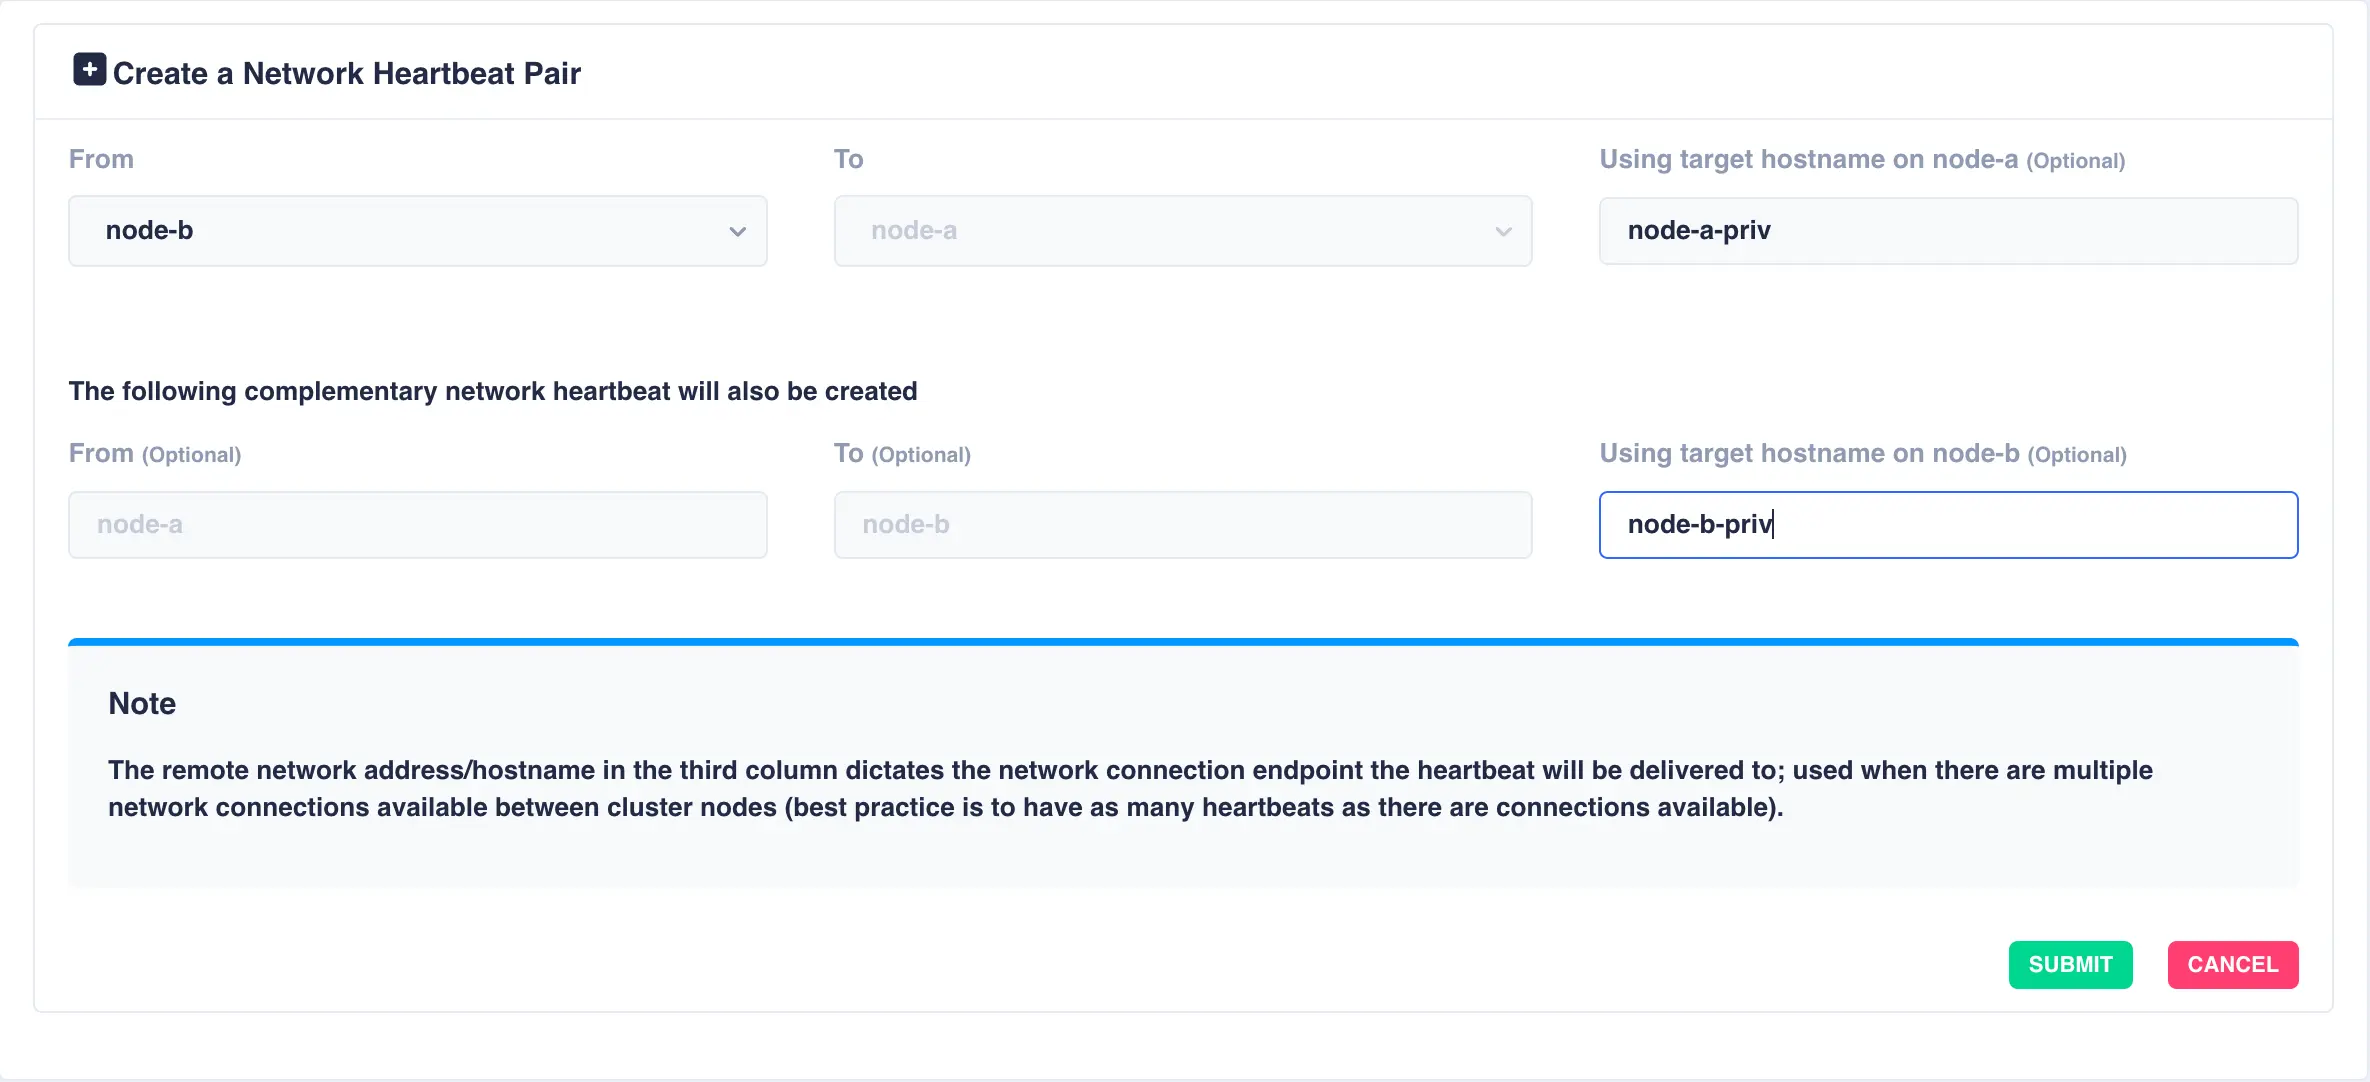
Click SUBMIT to add the heartbeat. The new heartbeat will added and shown in the heartbeat panel:
This completes basic cluster configuration.
For more advanced configuration and operational procedures please see the online user guide.
-
RSF-1 uses broadcast packets to detect cluster nodes on the local network. Broadcast packets are usually blocked from traversing other networks and therefore cluster node discovery is usually limited to the local network only. ↩